


14628 Central Blvd,
Chino, CA91710
tel:909.597.7588, fax:909.597.1939
© Copyright 2011 Acnodes, Inc.
All rights reserved. Product description and product specifications
are subject to change without notice. For latest product information,
please visit Acnodes’ web site at www.acnodes.com.
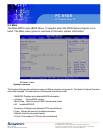
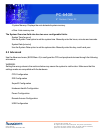
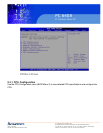
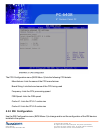
PC 6408
8” Fanless Panel PC
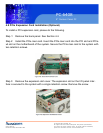
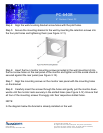
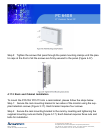
Step 5: Tighten the screws that pass through the panel mounting clamps until the plas-
tic caps at the front of all the screws are firmly secured to the panel (Figure 4-37).
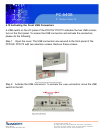
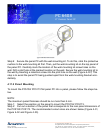
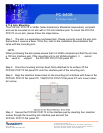
4.11.3 Rack and Cabinet Installation
To mount the PC5153/ PC5173 into a rack/cabinet, please follow the steps below.
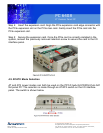
Step 1: Secure the rack mounting bracket to two sides of the monitor using the sup-
plied retention screws (Figure 3-17). Each bracket requires four screws.
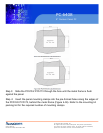
Step 2: Secure the rack mounting bracket to the rack by inserting and tightening the
supplied mounting nuts and bolts (Figure 3-17). Each bracket requires three nuts and
bolts for installation.