ADCP-80-526 • Issue 6 • December 2006
Page 26
© 2006, ADC Telecommunications, Inc.
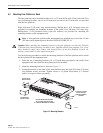
4.9 Installing Fuse Designation Card Holder and Card
Attach the fuse designation card holder to the fuse platform, to one of the fuse platform mount-
ing brackets, or to a part of the rack. Remove the backing from the back of the card holder and
press the card holder against the mounting surface. Fill out one of the cards with the required
circuit information insert it in the card holder.
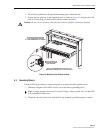
4.10 Installing Voltage Designation Label
Write the voltage used in the fuse platform on the voltage designation label and attach the label
to the back of the fuse platform.
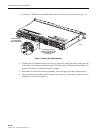
4.11 Installing Fuses
Replace the dummy fuses in the fuse holder with the appropriate type and value fuses. Leave the
dummy fuses in unused fuse positions.
5 SYSTEM CHECK
Perform the following procedures to check out the platform after completing installation.
5.1 Wiring Connections Torque Measurements
Measure the torque of all input, output, chassis ground and fuse alarm relay contact connections
included in the non-powered testing paragraphs above using a torque screwdriver that is
calibrated in pound force-inches (Newton-meters). The torque specifications are printed on the
rear of the panel adjacent to the connector.
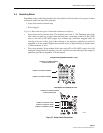
5.2 Power Indication Test
After checking input resistance and verifying the wiring connections torque, power may be
applied to the fuse platform. Upon power application, the fuse alarm indicators will not light
unless no fuse is in the fuse holder or a fuse that has failed is in the fuse holder.
The fuse alarm relay should indicate an open circuit between the normally open (NO) terminals
and the common (C) terminals and a closed circuit between the normally closed (NC) terminals
and the common terminals.
Note: The KLM fuse positions require that a load be connected to the corresponding
outputs in order for the indicators to light.


