9
Configuration for Synchrony
To correctly configure Synchrony, you need to install a copy on each system,
configure one as the server and the rest as clients. You then need to define the
relationships between the screens so that Synchrony knows when to switch, and
to which screen.
To configure Synchrony
1 Locate the Synchrony zip file on the supplied Adder CD-ROM (issue v6.0e or
later) or download it from the adder.com website.
2 Unzip the file and place the resulting group of files within a ‘Synchrony’
folder on each of the computer systems that are connected to the Adder
TS4 unit.
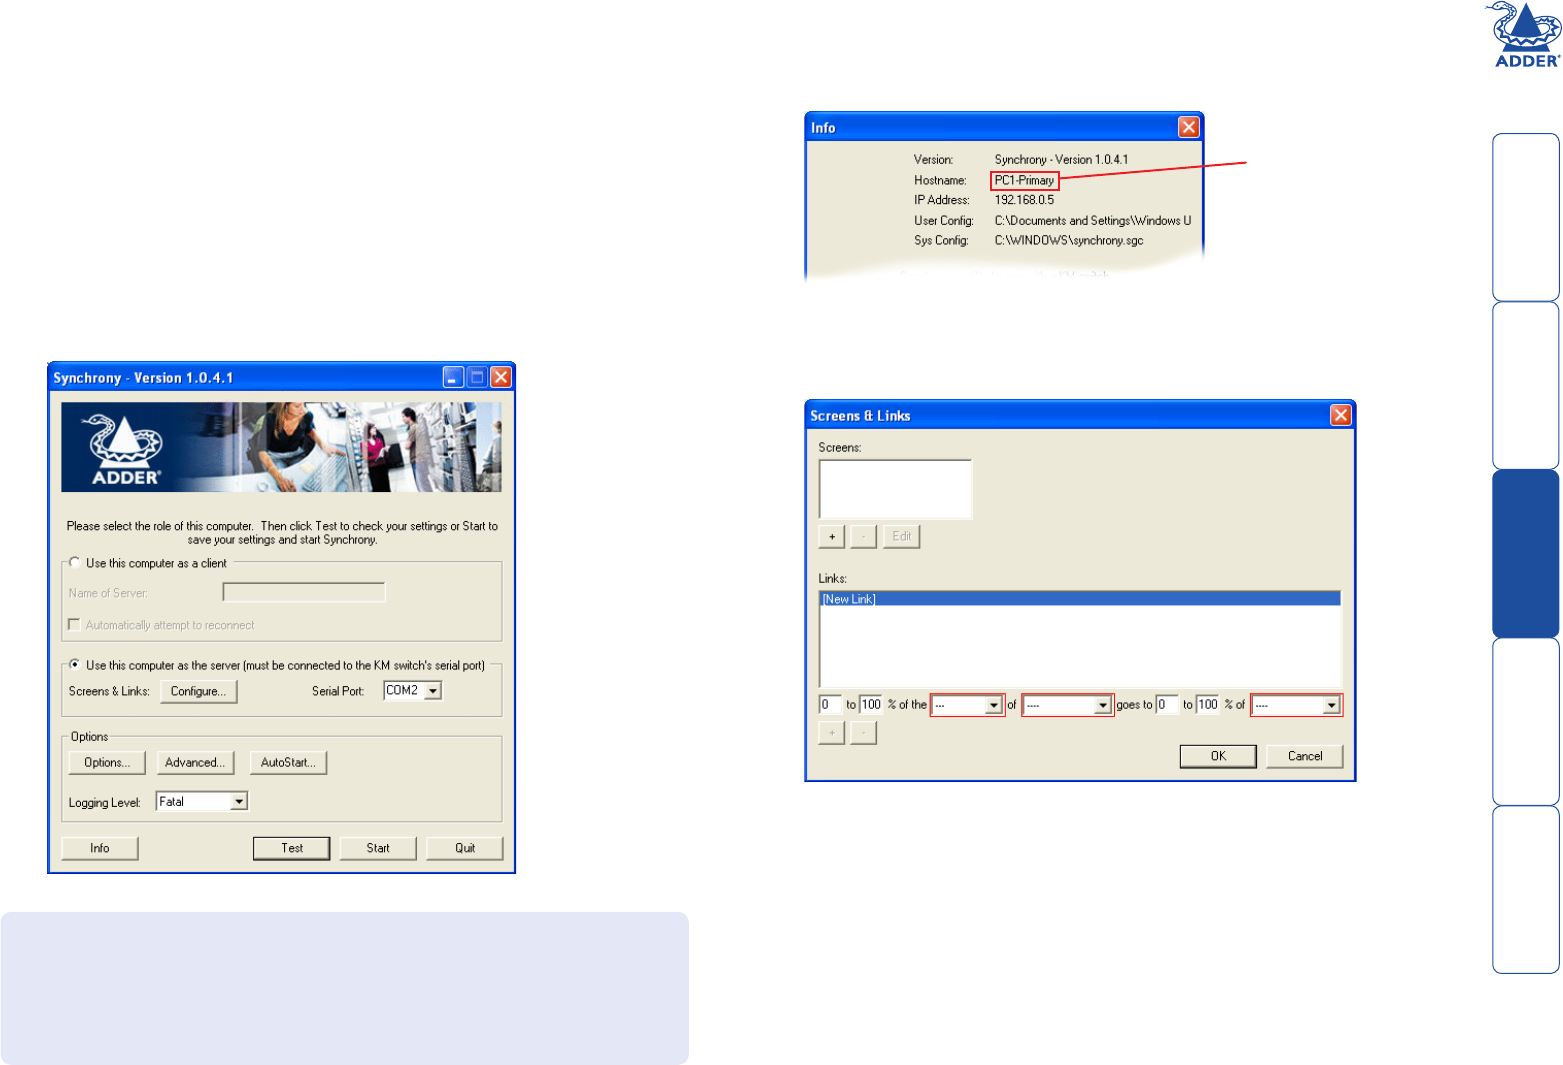
3 On each system, run the ‘synchrony.exe’ file. The main Synchrony window
will be displayed:
4 First, you need to discover the fixed ‘Hostname’ of each system as these will
be used to address each of them on the network. Click the ‘Info’ button to
display the following dialog box:
This is where you will register each computer (including the primary system
itself) and define the positional relationships between their monitor screens.
continued
Note the ‘Hostname’
as you will need to
reference this system
using this name.
Repeat this procedure within the copy of Synchrony on each system.
5 On the ‘primary system’ only (the one that has its serial port connected to
the Adder TS4 unit), select the ‘Use this computer as the server...’ radio
button and then click the ‘Configure’ button:
The Synchrony application consists of three main files plus other supporting
items. The three files are as follows:
Synchrony.exe The main file used to perform the initial configuration.
Synchronyc.exe This is the application file that runs on the client systems.
Synchronys.exe This is the application file that runs on the server system.


