


Installation and Safety Guide 25
613-000313 Rev C
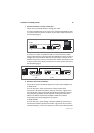
AR440S, AR441S, AR442S Routers
This section describes how to install the AR440S, AR441S and AR442S routers.
■ “Installing the AR440S, AR441S, AR442S” below
■ “Configuring the AR440S, AR441S, AR442S” on page 29
■ “Connecting Data Cables to AR440S, AR441S, AR442S” on page 35
■ “System LEDs on AR440S, AR441S, AR442S” on page 36
For corresponding information about installing an AR415S, see “AR415S Router” on
page 15.
For corresponding information about installing an AR450S, see “AR450S Routers”
on page 7.
Installing the AR440S, AR441S, AR442S
Selecting a Site
You can install the router:
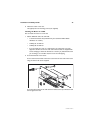
■ on a level surface such as a desktop or bench
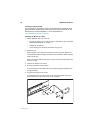
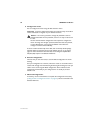
■ in a standard 19-inch rack, using the rack-mount kit supplied with the router
■ on a firm wall, using a wall-mount kit ordered from your authorised Allied
Telesis distributor or reseller
When you install the router, choose a site that:
■ allows adequate airflow around the router and its vents
■ is free of dust and moisture
■ AR440S, AR441S, AR442S: will maintain an ambient temperature in the range
0ºC to 50ºC (32ºFto122ºF)
■ will maintain a humidity in the range 5% to 80% non-condensing
■ has a reliable and earthed (grounded) power supply, preferably dedicated and
filtered
■ does not expose cabling to sources of electrical noise such as radio transmitters,
broadband amplifiers, power lines, electric motors, and fluorescent fixtures
■ allows easy access to the router’s power and cable connections
Before Installing the Router
■ Read the safety information “Safety” on page 41.
■ Unpack the router. Verify the package contents. If any items are damaged or
missing, contact your sales representative.