6 AutoView Wireless Installer/User Guide
3. Prepare locations for your AutoView Wireless transmitter and KVM switch. Best performance
is achieved when the antennas are clearly visible and free from obstructions.
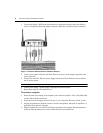
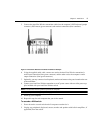
4. Connect the AutoView Wireless transmitter cables into the KVM switch’s PS/2 keyboard (pur-
ple connector), PS/2 mouse (green connector) and monitor connections (blue connector).
5. Using the supplied audio cable, connect one end to the AutoView Wireless transmitter’s
audio input connection (lime green connector) and the other end to the switch’s audio output
connection (lime green connector).
6. Optionally, you may connect a local keyboard, monitor and mouse to the ports located on the rear
of the transmitter.
7. Connect your AutoView Wireless transmitter to an AC power source with one of the power sup-
plies included with your AutoView Wireless switch.
NOTE: The transmitter must be powered up before the computer.
NOTE: Use only an Avocent-supplied power supply.
8. Power up the cascaded KVM switch.
9. Power up any computers attached to your cascaded KVM switch.
10. Activate the AutoView Wireless OSD and select the cascaded switch. Ensure that the cascaded
KVM switch is displaying video, then reactivate the AutoView Wireless OSD and run the
AutoSetup feature. (For more information on activating the OSD and running AutoSetup, see
Fine Tuning the Image Settings in Chapter 3.)
11. Repeat these steps for each additional switch that you wish to attach.
NOTE: Once you have selected a KVM switch from the AutoView Wireless OSD, you will need to activate OSD
for the switch to connect to attached computers. To avoid confusion, the attached KVM switch should have an
OSD activation sequence that is different from the activation sequence for the AutoView Wireless switch.


