


Operation 27
Other adjustments
If you are not satisfied with the picture quality made by the preset modes. You can manually
adjust some of the settings through the OSD menus.
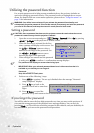
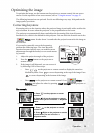
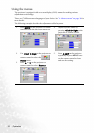
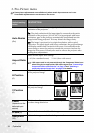
1. Adjusting brightness
Press MENU on the projector or remote control. Go to Picture --> Brightness
and adjust the values by pressing Left/ Right on the projector or remote control.
The higher the value, the brighter the image. And lower the setting, darker the image. Adjust
this control so the black areas of the image appear just as black and that detail in the dark
areas is visible.
It is possible that you may see the center of the projected image is slightly brighter than the
corners. This is a normal behavior because the projector doesn’t carry brightness evenly
throughout the image it projects, which causes an uneven distribution of light output on the
image you see.
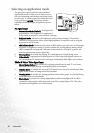
2. Adjusting contrast
Press MENU on the projector or remote control. Go to Picture --> Contrast and
adjust the values by pressing Left/ Right on the projector or remote control.
The higher the value, the greater the contrast. Use this to set the peak white level after you
have previously adjusted the Brightness setting to suit your selected input and viewing
environment.
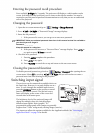
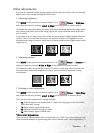
3. Selecting a color temperature
Press MENU on the projector or remote control. Go to Picture --> Color Temp
and adjust the values by pressing Left/ Right on the projector or remote control.
There are four color temperature* settings available.
1. T1: With the highest color temperature, T1 makes the image appear the most bluish
white than other settings.
2. T2: Makes images appear bluish white.
3. T3: Maintains normal colorings for white.
4. T4: Makes images appear reddish white.
*About color temperatures:
There are many different shades that are considered to be “white” for various purposes. One
of the common methods of representing white color is known as the “color temperature”. A
50
-30
+70
-30
50
+70