10
Overview
English
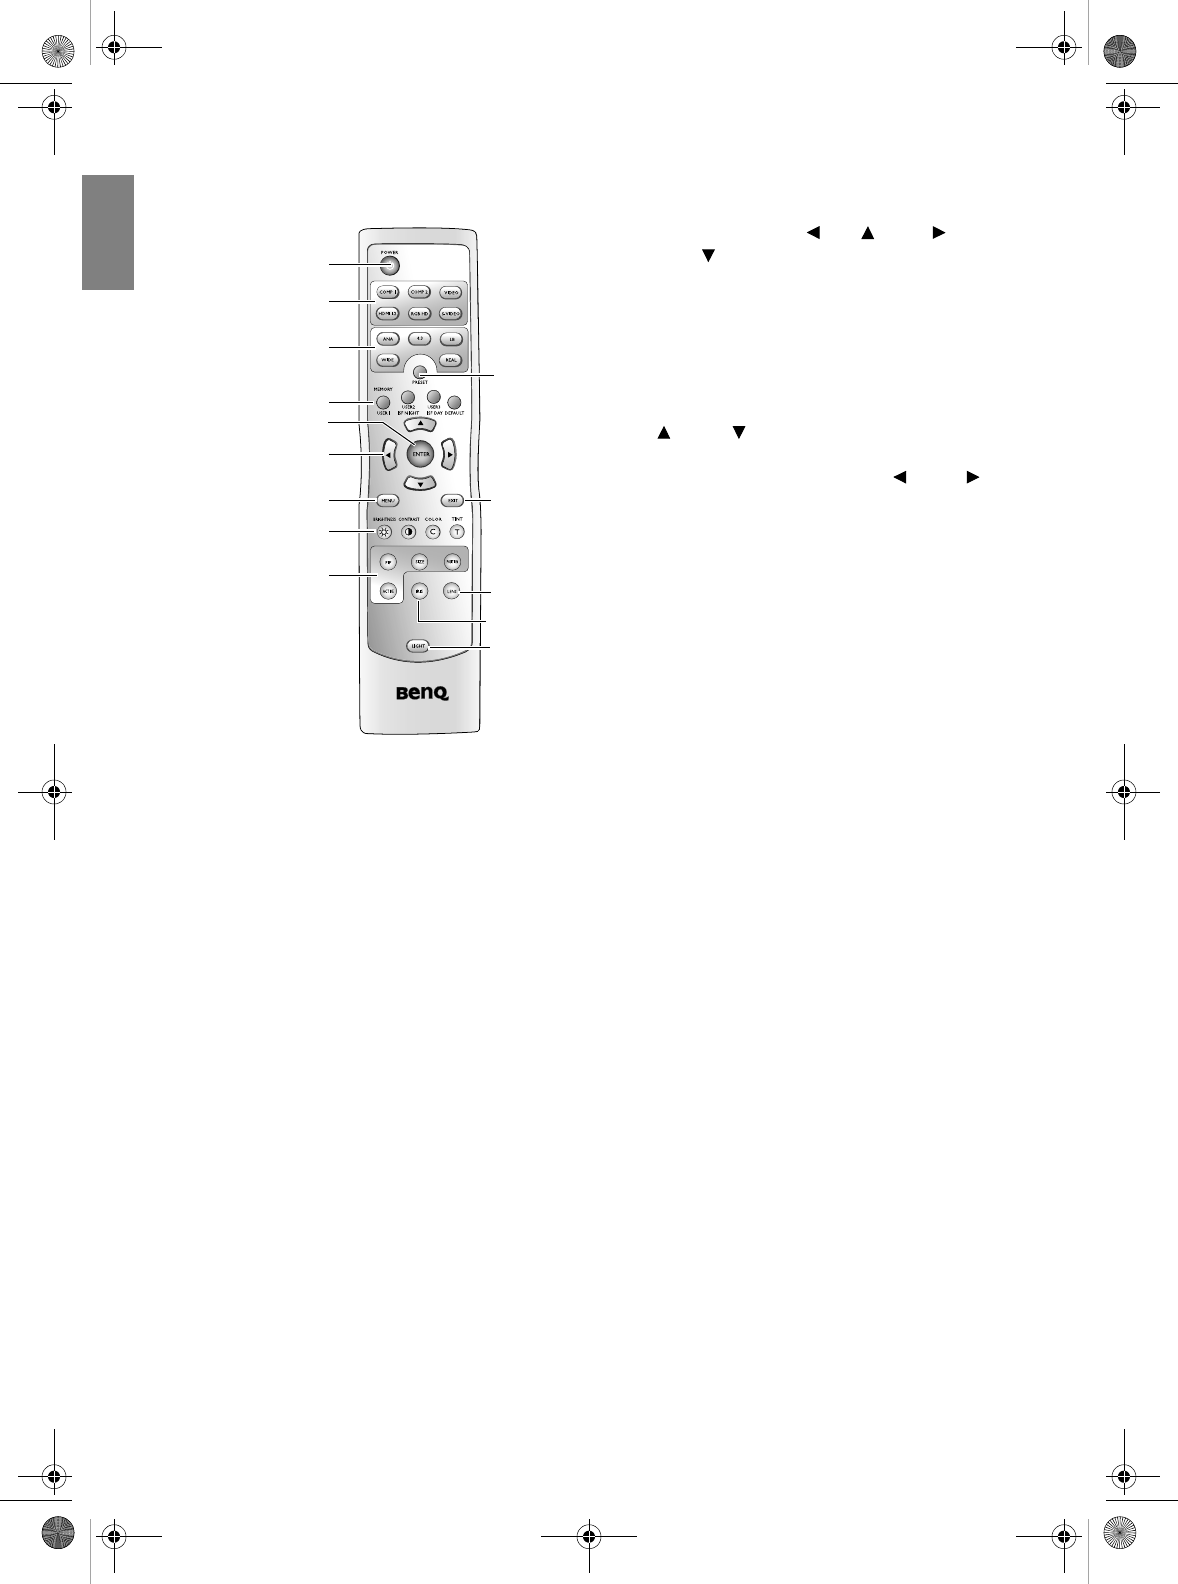
Remote control
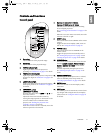
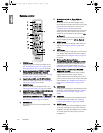
7. Arrow buttons (Left , Up , Right ,
Down )
Moves the current On-Screen Display (OSD)
menu selection in the direction of the arrow being
pressed when the OSD menu is activated. See
"Using the menus" on page 20 for details.
Adjusts the motorised vertical lens by moving the
image upwards or downwards on the screen in
relation to the orientation of the projector. (Up
, Down )
Manually corrects distorted pictures resulting
from an angled projection. (Left , Right )
8. MENU button
Toggles the On-Screen Display (OSD) menu on
and off. See "Using the menus" on page 20 for
details.
9. EXIT button
Goes back to previous OSD menus, exits and saves
any changes made using the On-Screen Display
(OSD) menu. See "Using the menus" on page 20
for details.
10. Picture quality adjustment buttons
(BRIGHTNESS, COLOR, CONTRAST, TINT):
Displays the setting bars for adjustment of the
appropriate picture quality values. See "Fine-
tuning the picture quality" on page 26 for details.
11. Picture window control buttons (PIP, SIZE,
POSITION, ACTIVE)
Displays the Picture In Picture (PIP) windows,
toggles between the main window and sub-
window with ACTIVE, and adjusts the size and
position of the currently active window with SIZE
and POSITION. See "Displaying more than one
image source simultaneously" on page 32 for
details.
12. LENS button
Displays the setting page for the adjustment of the
motorised vertical Lens shift value. See "Shifting
the projection lens vertically" on page 12 for
details.
13. IRIS button
Displays the setting bar for the adjustment of the
motorised aperture lens IRIS. See "Adjusting
contrast ratio via IRIS" on page 29 for details.
14. LIGHT button
Turns on the remote control backlight for about
10 seconds. Pressing any other button while the
backlight is on keeps the backlight on for a further
10 seconds. Press the button again to turn the
backlight off.
1. POWER button
Toggles the projector between standby and on.
See "Turning the projector on" on page 19 and
"Turning the power off" on page 34 for details.
2. Source selection buttons (COMP1, COMP2,
VIDEO, HDMI 1.2, RGB HD, S-VIDEO)
Selects an input source for display. See "Selecting
an input source" on page 19 for details.
3. Aspect buttons (ANA, 4:3, LB, WIDE, REAL)
Selects the display aspect ratio. See "Selecting the
aspect ratio" on page 30 for details.
4. PRESET button
Selects one of the preset program modes. See
"Selecting a preset mode" on page 24 for details.
5. MEMORY buttons (USER 1, USER 2/ISF NIGHT,
USER 3/ISF DAY, and DEFAULT)
Restores picture settings saved in USER 1, USER
2/ISF NIGHT, USER 3/ISF DAY, or DEFAULT for
the current input source. See "Setting the User 1/
User 2/User 3 mode" on page 25 for details.
6. ENTER button
Enacts the selected On-Screen Display (OSD)
menu item.
1
2
3
4
5
7
6
9
12
14
8
10
11
13
W20000-en.book Page 10 Monday, October 22, 2007 3:35 PM


