


12
Positioning your projector
English
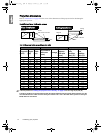
Obtaining a preferred projected image size
The distance from the projector lens to the screen, the zoom setting, and the video format each factors in the
projected image size.
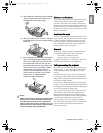
The projector should always be placed horizontally level (like flat on a table), and positioned directly
perpendicular (90° right-angle square) to the horizontal center of the screen. This prevents image distortion
caused by angled projections (or projecting onto angled surfaces). If the projector is mounted on a ceiling, it
must be mounted upside-down.
This projector is equipped with a movable lens. See "Shifting the projection lens vertically" below for details. You
can see the diagrams on pages 14 and 15 for the vertical offset values in the dimension tables that are measured
when the lens is shifted fully up or down.
If the projector is positioned further away from the screen, the projected image size increases, and the vertical
offset also increases proportionately.
When determining the position of the screen and projector, you will need to account for both the projected
image size and the vertical offset dimension, which are directly proportional to the projection distance.
BenQ has provided separate tables of dimensions for both 16:9 and 4:3 screen ratios to assist you in determining
the ideal location for your projector. There are two dimensions to consider, the perpendicular horizontal distance
from the center of the screen (projection distance), and the vertical offset height of the projector from the
horizontal edge of the screen (offset).
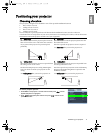
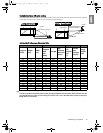
Shifting the projection lens vertically
The vertical lens shift control provides flexibility for installing your projector. It allows the projector to be
positioned slightly above or below the top level of the projected images.
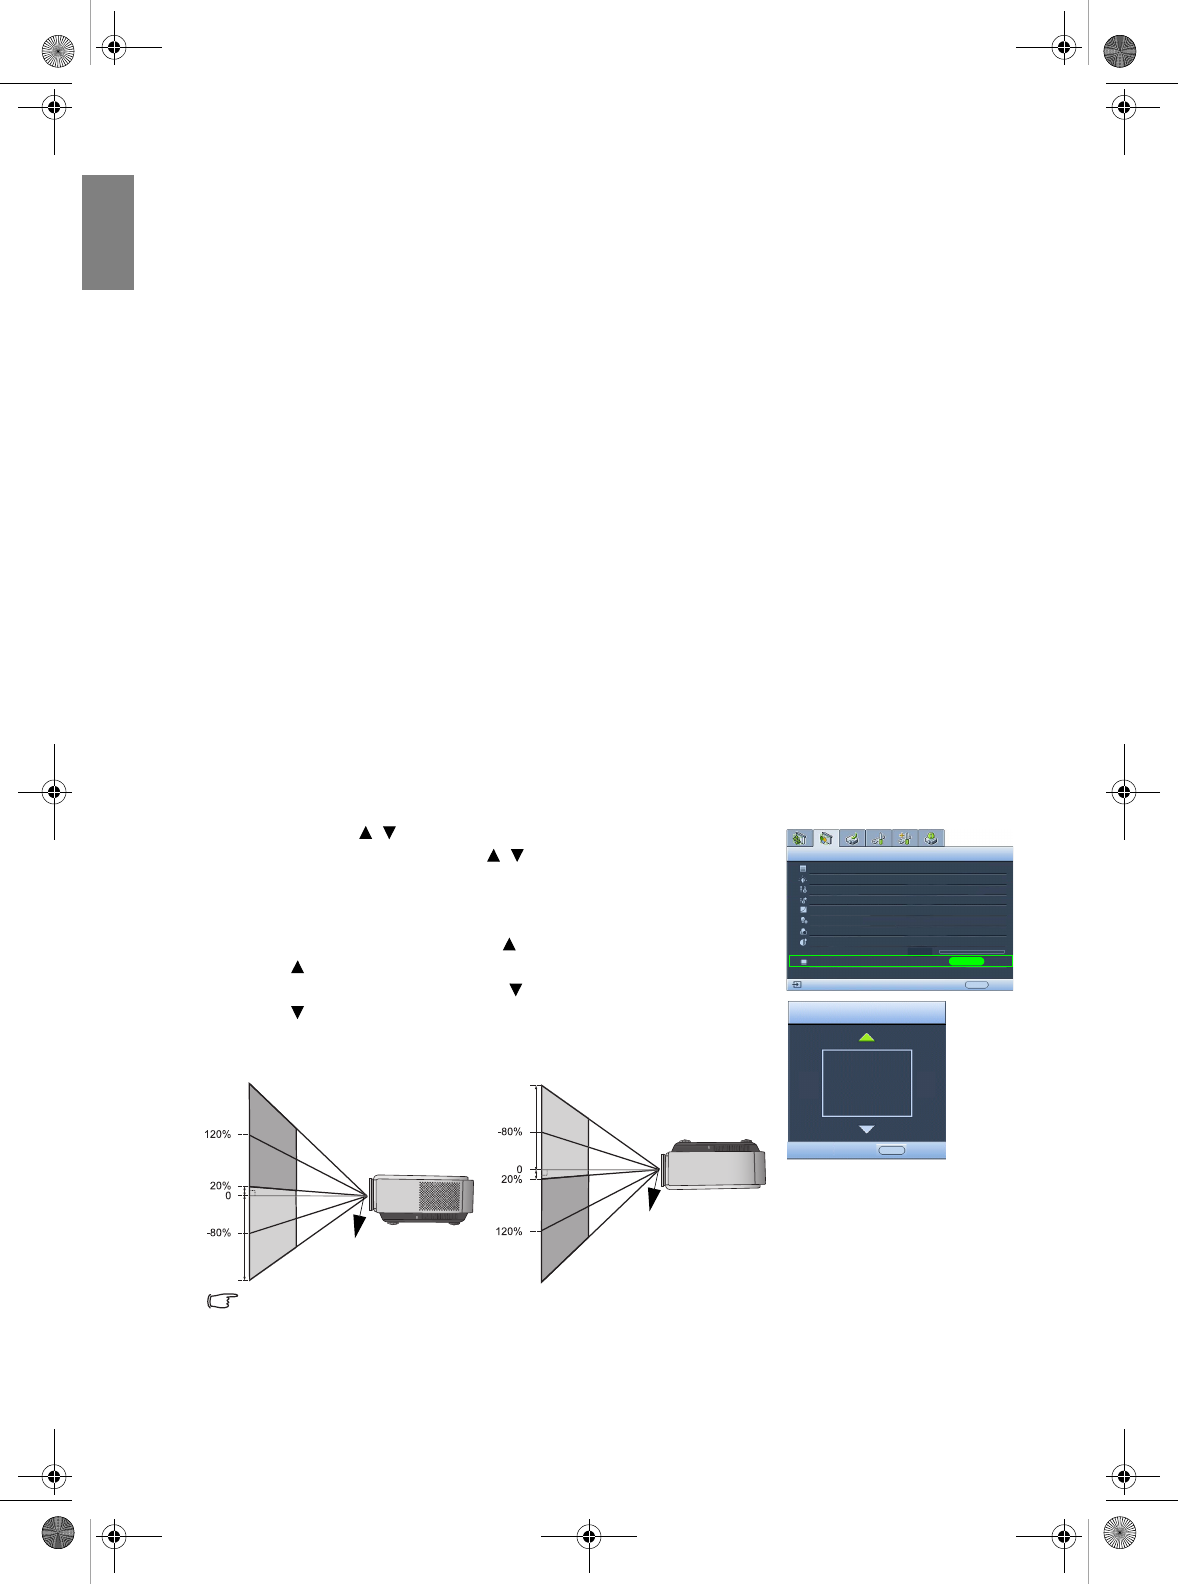
The lens shift (offset) is expressed as a percentage of the projected image height. It is measured as an offset from
the projected image's vertical center. The projector is equipped with + 120% and - 80% vertical lens shift. You
can shift the projection lens upwards or downwards within the allowable range depending on your desired image
position.
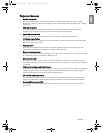
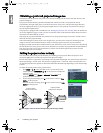
To adjust the vertical position of the projection lens:
1. Press LENS or / (when the OSD menu is not activated) on the
remote control, or LENS SHIFT / on the projector to display the
adjustment page.
(Pressing ENTER in the Picture -- Advanced > Lens Shift menu
performs the same function.)
2. To raise the projected image, press on the remote control or Lens
Shift on the projector.
To lower the projected image, press on the remote control or Lens
Shift on the projector.
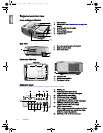
Black Level
Clarity Control
Color Temperature
Picture -- Advanced
S-Video
0 IRE
EXIT Back
Normal
Color Temperature User_ Fine
Gamma Selection
Color Management
Brilliant Color
IRIS
ENTER
2.4
Lens Shift
0
Lens Shift
EXIT Back
On
Dynamic Black On
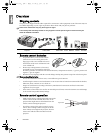
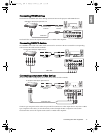
Center of the lens
Center of the lens
Projector position:
Floor front or floor rear
Projector position:
Ceiling front or ceiling rear
(C)
(D)
(C)
(D)
See pages 14 and 15 for the corresponding values of (C) and (D).
W20000-en.book Page 12 Monday, October 22, 2007 3:35 PM