Installing the Printer Driver
22
STEP 2
Windows
®
Windows
®
Wireless
Network
Configuration in Infrastructure mode, using a network cable temporarily
Before configuring the wireless settings
Important
• If you have previously configured the wireless
settings of the printer, you must reset the print
server back to the default factory settings (see
page 46)
• You must know your wireless network settings
before you proceed with this installation.
• You need to temporarily use an Ethernet cable
during configuration.
Configure the wireless settings
1 Make sure the printer power switch is on.
2 Turn on your computer. (You must be logged
on with Administrator rights.)
3 Put the supplied CD-ROM into your CD-ROM
drive. The opening screen will appear
automatically.
Choose your printer model and the language.
Note
If the opening screen does not appear, use
Windows
®
Explorer to run the start.exe program
from the root folder of the Brother CD-ROM.
4 Click Install Printer Driver on the menu
screen.
Note
Choose the Install Printer Driver icon for your
region.
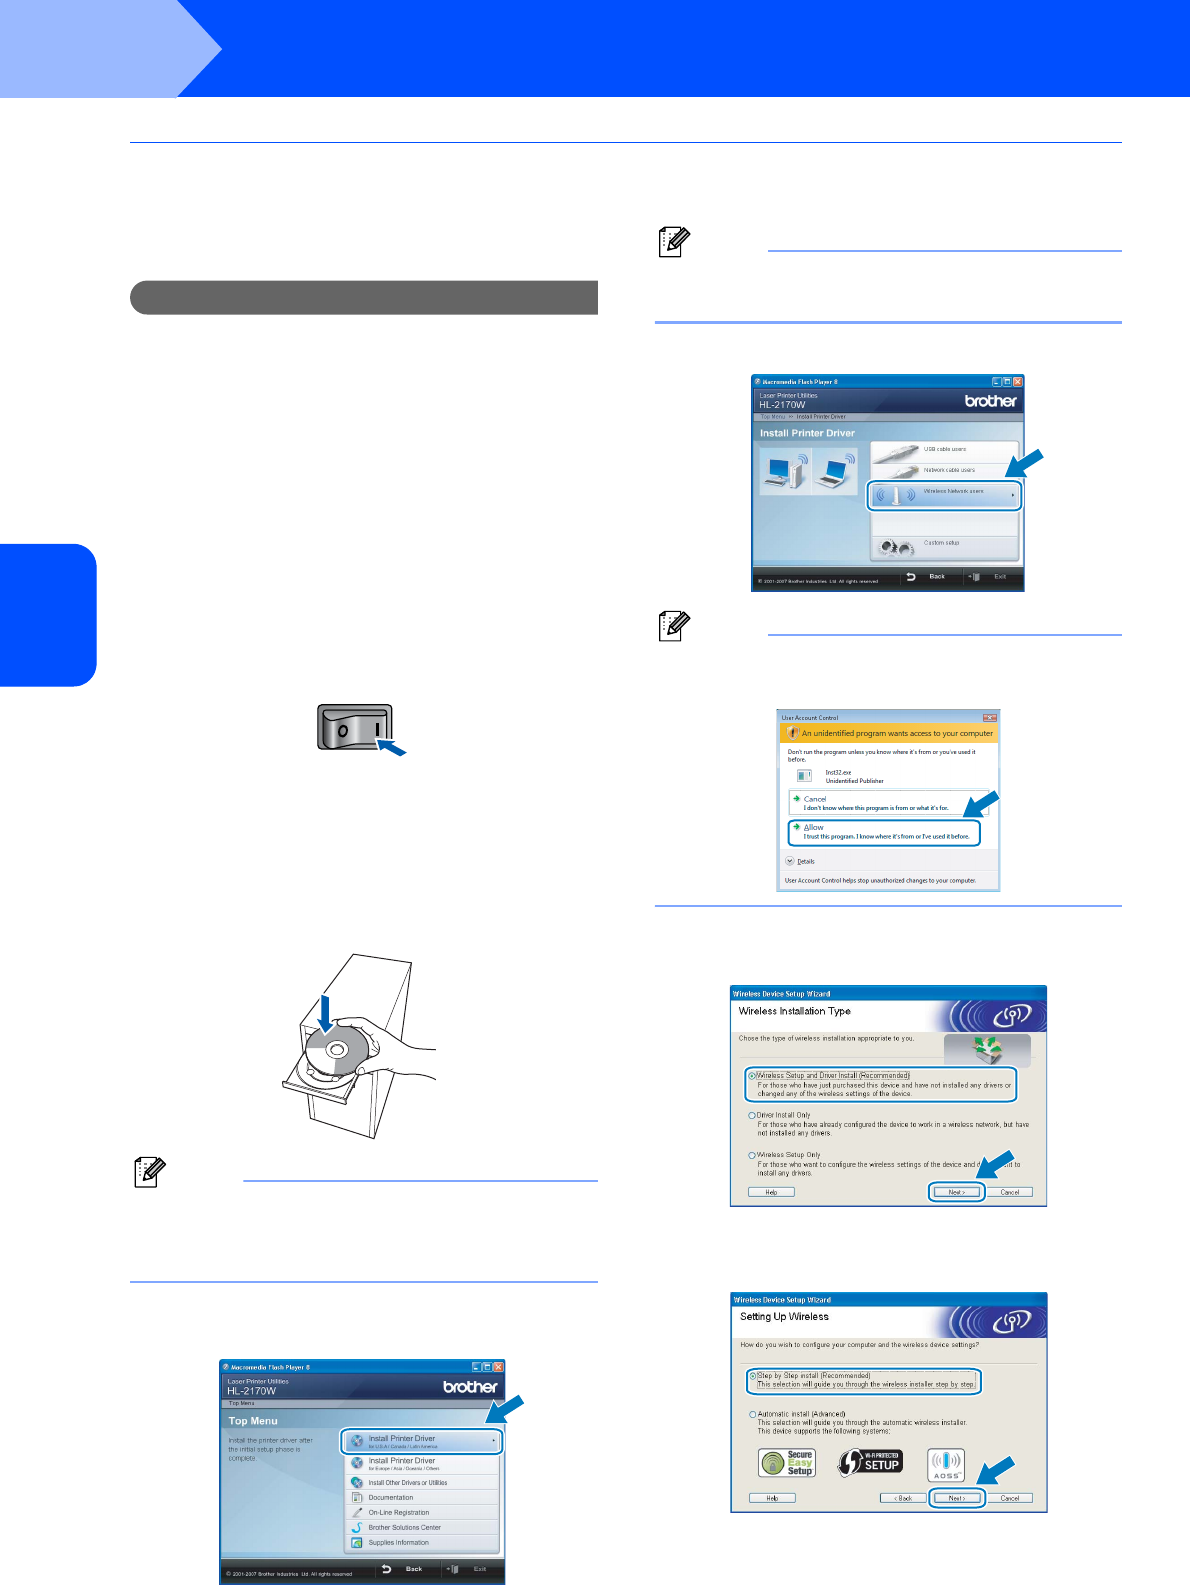
5 Click Wireless Network users.
Note
For Windows Vista™, when the User Account
Control screen appears, click Allow.
6 Choose Wireless Setup and Driver Install
(Recommended), and then click Next.
7 Choose Step by Step install
(Recommended) and then click Next.


