


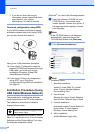

Setting Up the Printer
15
1
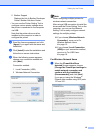
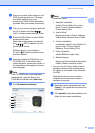
• If your access point is set to not broadcast
the SSID, you can enter the SSID
manually by clicking the [Advanced]
button. Follow the on-screen instructions
for entering the [Name (SSID)], and then
click [Next].
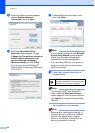
g Enter the [Network Key] you noted in
MEMO uu page 11 and then click
[Next].
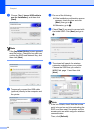
Note
If your network is not configured for
authentication and encryption, the
[ATTENTION!] screen will appear. To
continue configuration, click [OK] and go
to h.
h Confirm the wireless network settings
and then click [Next]. The settings will
be sent to your printer.
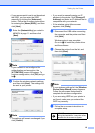
Note
• The settings will remain unchanged if you
click [Cancel].
• If you want to manually assign an IP
address to the printer, click [Change IP
Address] and enter an IP address that is
compatible with your network.
• If the wireless setup failure screen
appears, click [Retry].
i Disconnect the USB cable connecting
the computer and the printer and then
click [Next].
Wireless setup is now complete.
Go on to j to install the printer driver
and the software.
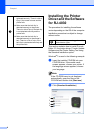
j Choose the printer from the list, and
then click [Next].
Note
• If your wireless settings fail, the [Wireless
Device Setup Wizard] screen appears.
Follow the on-screen instructions to
complete the wireless configuration.
• If you are using WEP but your printer is
not found, make sure you entered the
WEP key correctly.
k Follow the on-screen instructions to
complete setup.
DO NOT cancel any of the screens
during the installation. It may take a few
seconds for all screens to appear.