Chapter 5: Local Management
5-26 2E48-27R/2E49-27R User’s Guide
4. Use the arrow keys to highlight the SAVE command at the bottom of
the screen and press ENTER.
If the time entered is within the 3 to 99 seconds range, the message
“SAVED OK” displays at the top of the screen. If the entry is not valid,
Local Management does not alter the current setting, but it does refresh
the Screen Refresh Time field with the previous value.
5.7.8 Setting the Screen Lockout Time
The screen lockout time can be set from 1 to 30 minutes with a default of
15 minutes. To set a new lockout time, perform the following steps:
1. Use the arrow keys to highlight the Screen Lockout Time field.
2. Enter a number from 1 to 30.
3. Press ENTER to set the lockout time in the input field.
4. Use the arrow keys to highlight the SAVE command at the bottom of
the screen and press ENTER.
If the time entered is within the 1 to 30 minutes range, the message
“SAVED OK” displays at the top of the screen. If the entry is not valid,
Local Management does not alter the current setting, but it does refresh
the Screen Lockout Time field with the previous value.
5.7.9 Setting the Operational Mode
To set the Operational Mode, proceed as follows:
1. Use the arrow keys to highlight the Operational Mode field.
2. Press the SPACE bar to step to the appropriate operation mode
(802.1D SWITCHING, 802.1Q SWITCHING, or SECURE FAST
VLAN).
3. Use the arrow keys to highlight the SAVE command, then press
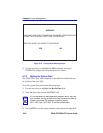
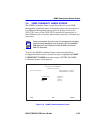
ENTER. The warning screen shown in Figure 5-13 displays.
NOTE
If the device is to be configured to operate as a SecureFast
switch, the device must be assigned a unique IP address that
has been saved (i.e., the device has rebooted and the new IP
address is active).


