


3-19
3
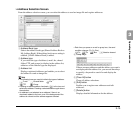
Operating Procedures
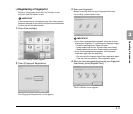
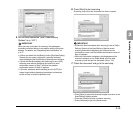
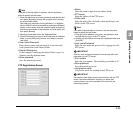
5. Set the scan conditions. (See “Scan/Delivery
Options” on p. 3-27.)
IMPORTANT
When you use a job button for scanning, the subsequent
procedure varies as follows in accordance with the job button
settings. For details, see “Registering New Job Buttons” on
p. 4-17.
• If [When you select this Job Button] is set to [Skip Scan Setting
Screen] and you press a job button, scanning is started
without displaying the Scan/Delivery Options screen of Step 4.
• If [Send the files immediately after scanning] is set to [ON],
scanning ends without displaying the continue to scan
confirmation screen of Step 7 and then the address
confirmation screen of Step 10 appears.
• If [Confirm addresses before sending] is set to [OFF], the
image is sent without displaying the address confirmation
screen of Step 10 and the operation ends.
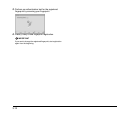
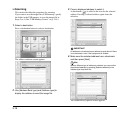
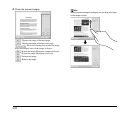
6. Press [Start] to start scanning.
Scanning stops after the document has been scanned.
IMPORTANT
• If [Send the files immediately after scanning] is set to [ON] in
Delivery Options of the Scan/Delivery Options screen,
scanning ends without displaying the continue to scan
confirmation screen, and the address confirmation screen of
Step 10 appears.
• When the confirmation message is left displayed and the
scanner transitions to Low Power Mode, all of the data
scanned up until that point is discarded. (See p. 3-3.)
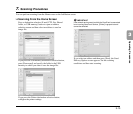
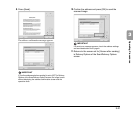
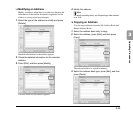
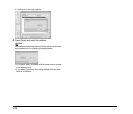
7. Check the document and go to the next step.
• Press [Abort] to cancel the scanned images and return to the
Scan/Delivery Options screen.
• Press the [Continue] button to resume scanning.
• Press [Complete] to go to the Send screen.