


E-19
Part 8 Printing
This part of the manual includes all the information you need
to print tapes.
Note The following information covers basic printing pro-
cedures only. Other printing related information can be found
in the sections of this manual describing presets (page
E-20), stamp printing (page E-25), frames, and memory op-
erations (page E-26).
Printing Precautions
• Never turn power off while printing is being performed.
• Make sure that the tape outlet is not blocked before you
start printing.
• Never operate the tape cutter while printer is being per-
formed (indicated by the message “NOW PRINTING” on
the display).
• During printing at very high density, printing of very long
text, or repeat printing of the same text a number of times,
the label printer may stop printing for about five seconds.
This is not a malfunction, and normal printing should
resume shortly.
Printing a Tape
Printing a tape is as easy as pressing the PRINT key.
To print a tape
1. Press the PRINT key to print a tape of the text you have
input and laid out.
• To stop a print operation that is in progress, press ESC.
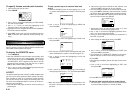
• You can add extra margin to the beginning of the tape by
pressing FUNC and then FEED before starting the print
operation.
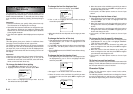
2. After the print operation is complete, rotate the tape cut-
ter lever to cut the tape.
• Make sure you rotate the tape cutter lever as far as it will
go, but do not apply excessive force.
3. Use scissors to trim the tape to the size you want, if nec-
essary.
• After you print a tape, you can peel off its paper backing
and stick the tape onto the object you want. Note that the
tape will not stick on coarse, wet, oily, or soiled surfaces.
Also, you should not try to use the tape where it is ex-
posed to direct sunlight or rain. Do not stick the tape onto
human skin.
• An easy way to remove the backing from a tape and ex-
pose the adhesive surface is to bend the tape near one of
its ends. This should cause the tape and its backing to
separate, allowing you to pull them apart.
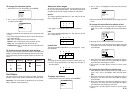
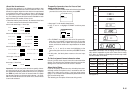
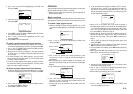
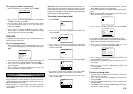
To adjust the print density
1. Turn power on.
2. Press SET UP to display the SET UP menu.
3. Use u and i to highlight “DENSITY”, and then press
SET.
––––
YTIS
N
E
D
–––
K
R
A
D
T
H
G
IL
><
54321
4. Use t and y to highlight the density you want to use
and then press SET to apply the setting and return to the
text input screen.
• The higher the number you select, the darker the charac-
ters that are printed.
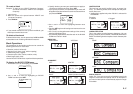
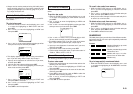
Using the Image Display
The image display lets you view a realistic image of exactly
what your tape will look like before you print it.
To show the image display
1. After laying out the label you plan to print, press IMAGE.
ABC
• The image on the display scrolls from right to left.
2. To stop the image from scrolling and freeze the current
contents on the display, press SET.
3. Press SET again to resume scrolling.
4. Press ESC to quit the image display.
• Labels that contain very thin lines or a large number of
characters may not appear normally on the image display.
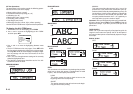
Part 9 Frames
The frame feature makes it easy to add attractive ornamen-
tal frames to your text. You get a choice of two types of
frames.
Frame around the printing area
Frames around each character
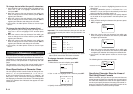
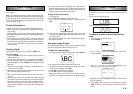
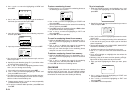
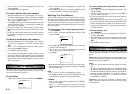
To specify a frame around the printing
area
1. Input the text you want to frame.
2. Press FRAME.
–––––
E
M
A
R
F
––––
TXETLLA
R
ET
C
A
R
A
HCHC
AE
3. Use u and i to move the highlighting to “ALL TEXT”
and press SET.
–––––
E
M
A
R
F
––––
1
–
TXETLLA
–
4. Use u, i, t and y to move the highlighting to the
frame you want to use and press SET.
–––––
E
M
A
R
F
––––
C
SE
/
TES?T
N
I
R
P
m
c5.8
H
T
G
N
EL
• See page E-30 for a complete list of the ALL TEXT frames
that are available.
5. Press SET to print your text with the selected frame or
ESC to abort the print operation without printing any-
thing.