


E-25
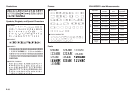
To change the week’s starting day
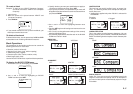
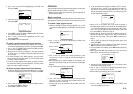
1. While a calendar is on the display, press FORM.
–––––
M
R
O
F
–––––
TA
M
R
O
F
LLA
R
A
DN
ELA
C
2. Use u and i to move the highlighting to “CALENDAR
FORMAT” and then press SET.
• You can specify either mirror or normal printing (page
E-18) and feed setting (page E-18), if you select “ALL”
and then press SET.
3. Use u and i to move the highlighting to either “MON-
DAY START” or “SUNDAY START” to select the starting
day for each week, and then press SET.
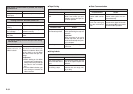
PHRASES
A collection of preset phrases can be recalled quickly and
easily when you need them.
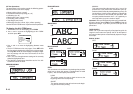
To print a preset phrase
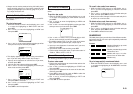
1. While the PRESETS menu is on the display, use u and
i to move the highlighting to “PHRASES” and then press
SET.
––––
SESA
RH
P
–––
D
T
N
E
G
RU
SSE
R
PXE
LAIT
N
E
D
IF
N
O
C
LIA
M
R
IA
D
IAP
R
EETSI
G
E
R
2. Use u and i to scroll through the preset phrases until
the one you want is highlighted and then press SET.
3. Use u and i to highlight “PRINT”, then press SET to
print the phrase.
4. Use u and i to move the highlighting to “EXIT” and
then press SET to end the operation.
Part 11 Stamp Printing
The stamp printing feature lets you create your own stamps
using a selection of various formats. Then you can print on
special stamp tape and attach the finished tape to an op-
tionally available stamp holder.
When using the ST-15 stamp holder, select NL (10×55mm)
as the stamp holder type in step 3 of the procedure de-
scribed below.
Important! Note that an optional special stamp tape car-
tridge and stamp tape holder is required in order to create a
pre-inked stamp. Contact your dealer to purchase the nec-
essary tape and holder. Load the special stamp tape before
performing the following procedure.
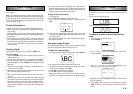
To create a new stamp label
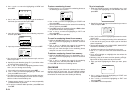
1. Press STAMP.
–––––
P
M
ATS
––––
W
E
N
LLA
C
E
R
ETELE
D
2. Use u and i to move the highlighting to “NEW” and
then press SET.
–––––
P
M
ATS
––––
)
mm
02×01
(
S
N
)
mm
55×01
(
L
N
)
mm
23×61
(
S
W
)
mm
07×61
(
L
W
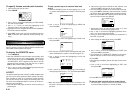
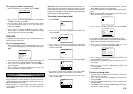
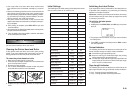
3. Use u and i to move the highlighting to the stamp
holder model that you will be using with your stamp tape
and then press SET.
G
N
O
L
E
R
A
U
Q
S
DNU
O
R
––
)
mm
02×01
(
S
N
–
4. Select the type of frame you want to use and press SET.
21
m
c3.5
H
T
G
N
EL
mm
81
H
T
D
I
W
• The number of layouts that appear on the right display
depends on the type of stamp holder you are using.
5. Use t and y to select the layout that you want to use
and then press SET.
S
N
AS
M
ETI
a
m
c3.5
H
T
G
N
EL
mm
81
H
T
D
I
W
6. Input the text you want to include in each block, and then
press SET to advance to the next block.
• To leave a block blank, press SET without inputting any-
thing.
• When you press SET after inputting the text for the last
block, the following menu appears.
–––––
P
M
ATS
––––
–
X
O
B
–
FF
O
7. Use u and i to select a box type and then press SET.
–––––
P
M
ATS
––––
Z
R
O
HN
O
IT
C
E
R
I
D
P
M
ATSES
U
m
c3.5
H
T
G
N
EL
mm
81
H
T
D
I
W
• If you select “ROUND”, proceed immediately to step 8.
• If you select “LONG FRAME”, you will then have to select a
specific frame type before to proceed to step 8.
8. Use u and i to move the highlighting and use t and
y to specify the setting and then press SET.
–––––
P
M
ATS
––––
T
N
I
R
P
E
R
O
TS
T
IXE
m
c3.5
H
T
G
N
EL
mm
81
H
T
D
I
W
9. Use u and i to move the highlighting to “PRINT” and
then press SET to execute it.
• After printing is complete, operate the tape cut lever to
cut the tape.
10.Use u and i to move the highlighting to “EXIT” and
then press SET.
11.Press SET to end the operation.
To store a stamp label
1. Perform steps 1 through 9 under “To create a new stamp
label” to create the label.
2. Use u and i to move the highlighting to “STORE” and
then press SET.
3. Input up to five characters for the name of the label, and
then press SET.
4. Press SET to store the label or ESC to abort the opera-
tion without storing anything.
24mm Tape
18mm Tape