


21
2
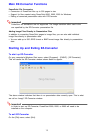
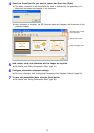
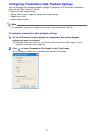
Configure the setting on the dialog box as described below.
3
After selecting the setting you want, click the [OK] button.
z This will apply the setting and close the dialog box.
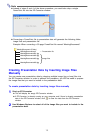
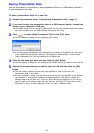
Editing Presentation Data
After you create presentation data by converting a PowerPoint file or by inserting image
files manually, you can add, delete, and change the positions of image files as required.
Before performing the procedures here, you will need to display the EZ-Converter window
that contains the presentation data that you want to edit. For details about how to do this,
see “Creating New Presentation Data” (page 17) and “Opening Presentation Data”
(page 28).
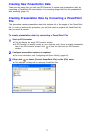
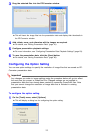
To add image files to presentation data
1
On the EZ-Converter window, click the thumbnail of the image that will come
either before or after the image you are about to add.
2
Use Windows Explorer to select the image file you want to add to the
presentation data.
z You can select one or more image files.
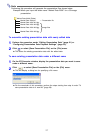
3
Drag the selected files into the EZ-Converter window.
z If you want the image file(s) to be inserted immediately following the image you selected
in step 1, simply drop the image file(s) into the EZ-Converter window. If you want the
image file(s) to be inserted in front of the selected image, hold down your computer’s
[Ctrl] key as you drop the image file(s) into the window.
z This will add the image file(s) and update the thumbnails in the EZ-Converter window.
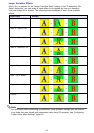
When you want to do this when converting a PowerPoint file
to presentation data:
Select this setting:
Save image files as high-quality JPEG files [High-quality]
Save image files as higher compression JPEG files [Normal-quality]