


2-11
Installation and Upgrade Guide for Cisco Unified Videoconferencing 3545 PRI Gateway and 3545 Serial Gateway Release 5.6
OL-17011-01
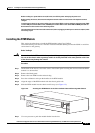
Chapter 2 Installing the Cisco Unified Videoconferencing 3545 Gateway
How to Perform the Initial Gateway Configuration
About the Initial Configuration and Boot Phases
Initial monitoring and administration of the gateway are performed from a remote PC via a serial
connection. This allows you to access the boot configuration menu of the gateway. At power-up, the
gateway goes through the following boot phases:
• Auto-boot—The embedded operating system initializes and displays basic information.
• Configuration menu—A 6-second countdown allows you to enter the configuration menu.
• Initialization—The gateway completes its boot sequence and is ready for operation.
Note You can perform serial port configuration of the gateway only at startup, during a short period indicated
by a 6-second countdown. Once the initialization phase is complete, the only way you can access the
configuration menu is by restarting the gateway.
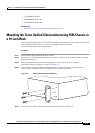
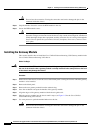
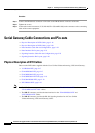
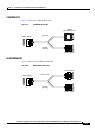
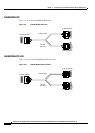
Connecting to a PC
Procedure
Step 1 Locate the terminal cable shipped with the gateway.
Step 2 Connect the end labeled PC to the serial port on the computer.
Step 3 Connect the end labeled Unit to the serial port connector on the gateway front panel.
Setting the IP Address
You use the serial port to configure the unit with an IP address and other address information.
You use the serial port on the gateway front panel to assign a new IP address to your gateway. You must
assign the IP address before you connect the gateway to the network.
Before You Begin
The PC terminal should have an installed terminal emulation application, such as HyperTerminal.
Gather the items listed in Table 2-6 to assign an IP address to the gateway.
Table 2-6 Requirements for Setting the IP Address
Requirements Notes
Dedicated IP address for the gateway
IP address of the default router the
gateway uses to communicate over the
network