3
Rack-Mount the Router (Optional)
Install the Hardware
53373
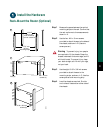
18.312"
(46.51 cm)
hole centerline
to hole centerline
17.72" min.
(45 cm)
Ears (2)
M4 x 10-mm
screws (4)
10-32 x 3/8-inch
screws (8)
Mounting strips
A
B
C
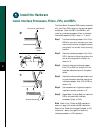
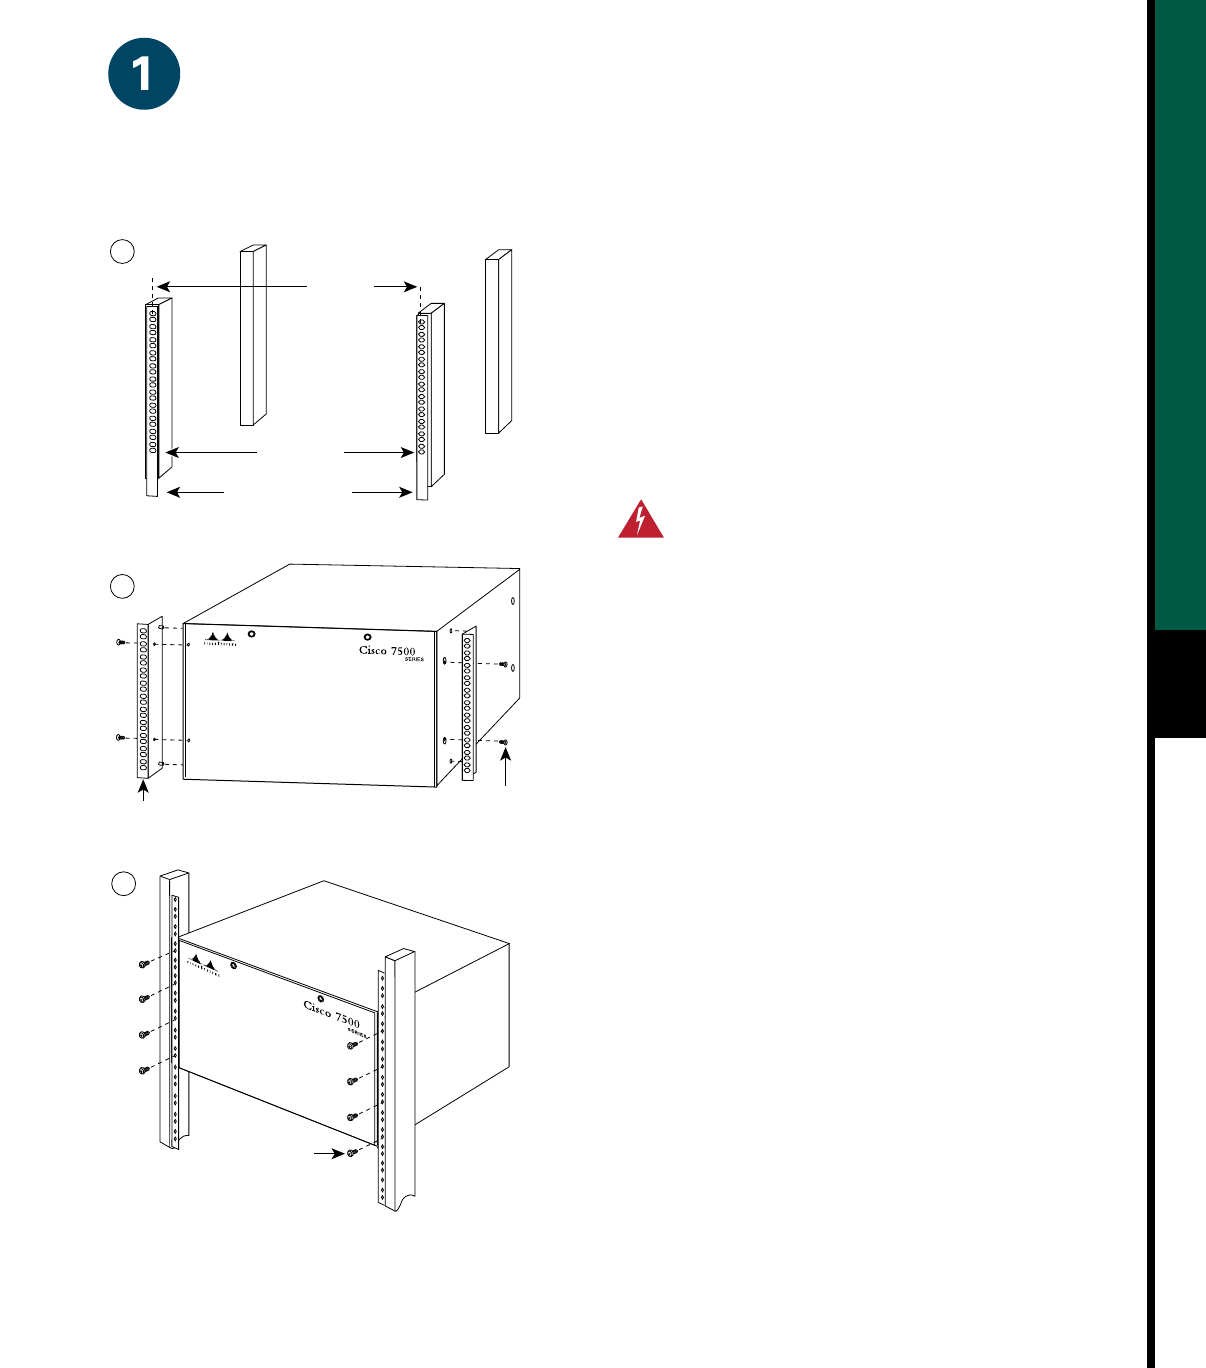
Step 1 Measure the space between the vertical
mounting strips on the rack. Confirm that
the rack conforms to the measurements
shown in A.
Step 2 Use the four M4 x 10-mm screws
provided to attach the ears to the sides of
the chassis, as shown in B. (Use two
screws per ear.)
Warning To prevent injury, two people
are required to lift the chassis. Grasp the
chassis underneath the lower edge, and lift
with both hands. To prevent injury, keep
your back straight and lift with your legs,
not your back.
Step 3 Use the eight 10-32 x 3/8-inch screws
provided to attach the ears to the
mounting strips, as shown in C. Use four
screws per ear and mounting strip.
Step 4 Level the chassis as required. Provide
two inches of clearance on either side of
the chassis.


