


Installing a LightStream 2020 Switch 2-23
Basic LS2020 Configuration Tasks
Proceed to the section below entitled “Connecting the Terminal to the NP.”
Step 10 For baud rate selection, this step requires that your LS2020 chassis be equipped with two
switch cards. It also assumes that you can communicate with the switch card that currently
needs no baud rate adjustment.
Dial into this card via its modem port or use the terminal attached to its console port to set
the baud rate, as instructed in Step 11 below.
However, if your LS2020 chassis does NOT contain redundant switch cards, or if neither
switch card is accessible via its console or modem port, an error condition exists. In this
case, contact your Cisco Systems customer support representative.
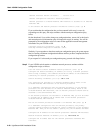
Step 11 Use the TCS hub set <“other” switch slot> console baudrate <rate> command to
set the console port baud rate for the “other” switch card to agree with the baud rate of the
terminal you are attempting to attach.
Step 12 Reset the “other” switch card manipulated in Step 11 above.
This action reinitializes the console port to the baud rate selected in Step 11 above.
Proceed to the section below entitled “Connecting the Terminal to the NP.”
Connecting the Terminal to the NP
Note This procedure assumes that you have already attached a terminal to the Release 2 switch
card, as described in the preceding section entitled “Attaching a Terminal and Matching the Baud
Rate.”
Toconnect aterminal tothe NP inyour LS2020 switch,perform theprocedure below. Forsimplicity,
this procedure assumes that you are using the NP in slot 1.
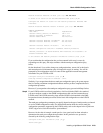
Step 1 Issue the following command at the TCS hub prompt to reset the NP to a running state:
TCS hub<<A>> reset 1
Step 2 Issue the following command at the TCS hub prompt to connect to the NP that you want to
configure:
TCS hub<<A>> connect 1
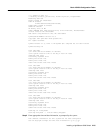
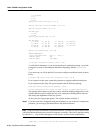
Step 3 When you connect to the NP, part or all of the following countdown sequence is displayed
on your screen. Do not press the Return key; allow the boot sequence to continue.
System will boot in 5 seconds: hit <RETURN> to interrupt.
System will boot in 4 seconds: hit <RETURN> to interrupt.
System will boot in 3 seconds: hit <RETURN> to interrupt.
System will boot in 2 seconds: hit <RETURN> to interrupt.
System will boot in 1 seconds: hit <RETURN> to interrupt.
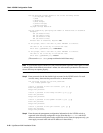
The screen displays for the boot sequence then continue as shown in Step 1 in the section “Entering
Configuration Data” later in this chapter. However, before proceeding with the entry of required
configuration data, note the following special consideration about running configuration scripts.