


2
1 About this Guide
This guide provides instructions on how to install and configure your Cisco Metro Ethernet (ME)
switch. Also covered are switch management options, basic rack-mounting procedures, port and
module connections, power connection procedures, and troubleshooting help.
For additional installation and configuration information, see the Cisco ME switch documentation on
Cisco.com. For system requirements, important notes, limitations, open and resolved bugs, and
last-minute documentation updates, see the release notes, also on Cisco.com.
When using the online publications, refer to the documents that match the Cisco IOS software version
that is running on the switch. Look on the switch rear panel to locate the software version.
You can order printed copies of the manuals from the Cisco.com sites and from the telephone numbers
listed in the “Obtaining Documentation” section on page 23.
Before you set up your switch, and to see translations of safety warnings, review the warnings
that appear in the Regulatory Compliance and Safety Information for the Cisco ME 3400 and
Cisco ME 2400 Switches that accompanies this guide.
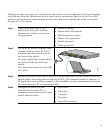
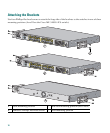
2 Taking Out What You Need
Follow these steps:
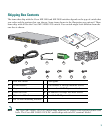
1. Unpack and remove the switch and the accessory kit from the shipping box.
2. Return the packing material to the shipping container, and save it for future use.
3. Verify that you have received the items shown in the “Shipping Box Contents” section on page 3.
If any item is missing or damaged, contact your Cisco representative or reseller for instructions.
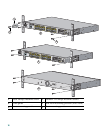
Some switch models might include additional items that are not shown on page 3. Some items are
optional and you must order or supply them separately.
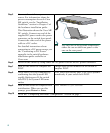
Equipment That You Supply to Set Up Your Switch
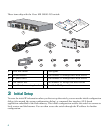
You need to supply this equipment to set up your switch:
• PC
• RJ-45-to-DB-9 adapter cable (if you did not order one with your switch)
• Ethernet (Category 5) straight-through cable (as shown)