3
Printer Adjustments
40
Adjusting the Transparent sensor
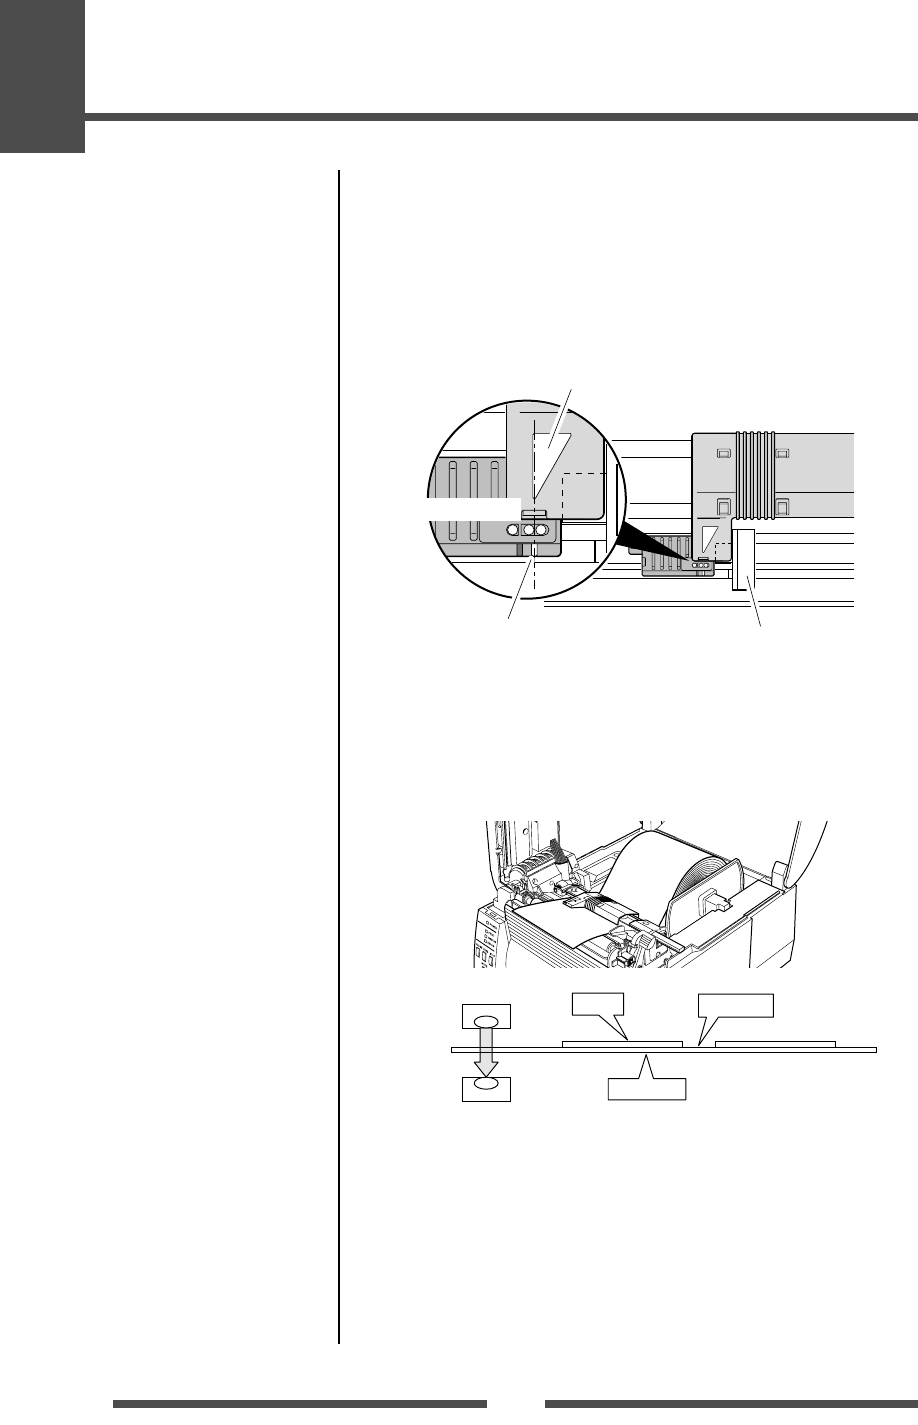
1. Push the large blue-head open lever to open the head unit and
sensor arm, then return only the sensor arm to its original
position. Align the upper sensor marker and the bottom sensor
marker (white) using the movable media guide.
Upper sensor
Bottom sensor
Movable media guide
Upper sensor marker
Alignment of markers
Transparent sensor marker
4. If the PAUSE key is pressed and released while the MODE/
REPEAT key is pressed, the PRINT LED goes off, after the
CONDITION LED switches from lit to rapid flashing, media
feeding starts, and the sensor is automatically adjusted.
5. If automatic adjustment stops normally, the PRINT LED and
CONDITION LED return to their original status. If it stops
abnormally (adjustment impossible), the CONDITION LED and
ERROR LED flash.
6. If the STOP key is pushed, it exits sensor adjustment mode.
2. Select the transparent sensor, and open the sensor arm.
3. Install only the liner media (label backing paper) with the label
media removed so that it will pass between the platen roller and
the media sensor. (Be careful that media with black marks does
not pass the media sensor.) Then close the sensor arm and the
printhead.
Label
Liner media
Media gap
Bottom sensor
Upper sensor
Media Setting (p.23)
Sensor Adjustments
Sensor Selection Method
(Transparent ↔ Reflective)
(p.39)


