


57
Printer Adjustments
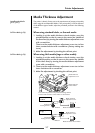
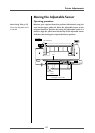
Media Thickness Adjustment
The printer is already factory-set to the requirements of proper print quality
while using the recommended labels. If the print quality is inferior because
of the different type of media, adjust the printhead position in the following
manner:
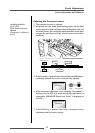
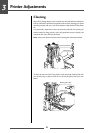
When using standard labels, or thermal media
1. Looking in at the media thickness check window, reset the
printhead offset so that it comes to the center line (middle of
the three lines) by turning the media thickness adjustment screw
with a screwdriver.
Then turn the media thickness adjustment screw two to four
times counterclockwise with a screwdriver. (Factory setting: two
turns.)
2. Make fine adjustments by checking the self-test print.
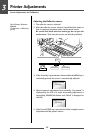
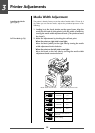
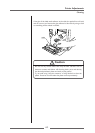
When using thick media (tags or other media)
1. Looking in at the media thickness check window, reset the
printhead position so that it comes to the center line (middle
of the three lines) by turning the media thickness adjustment
screw with a screwdriver.
2. Then turn the media thickness adjustment screw two to four
times clockwise with a screwdriver.
3. Make fine adjustments by checking the self-test print.
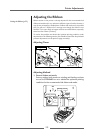
Installing the Media
(p.25, p.27)
Self Print Mode (p.36)
Media thickness
adjustment screw
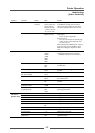
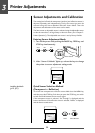
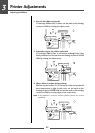
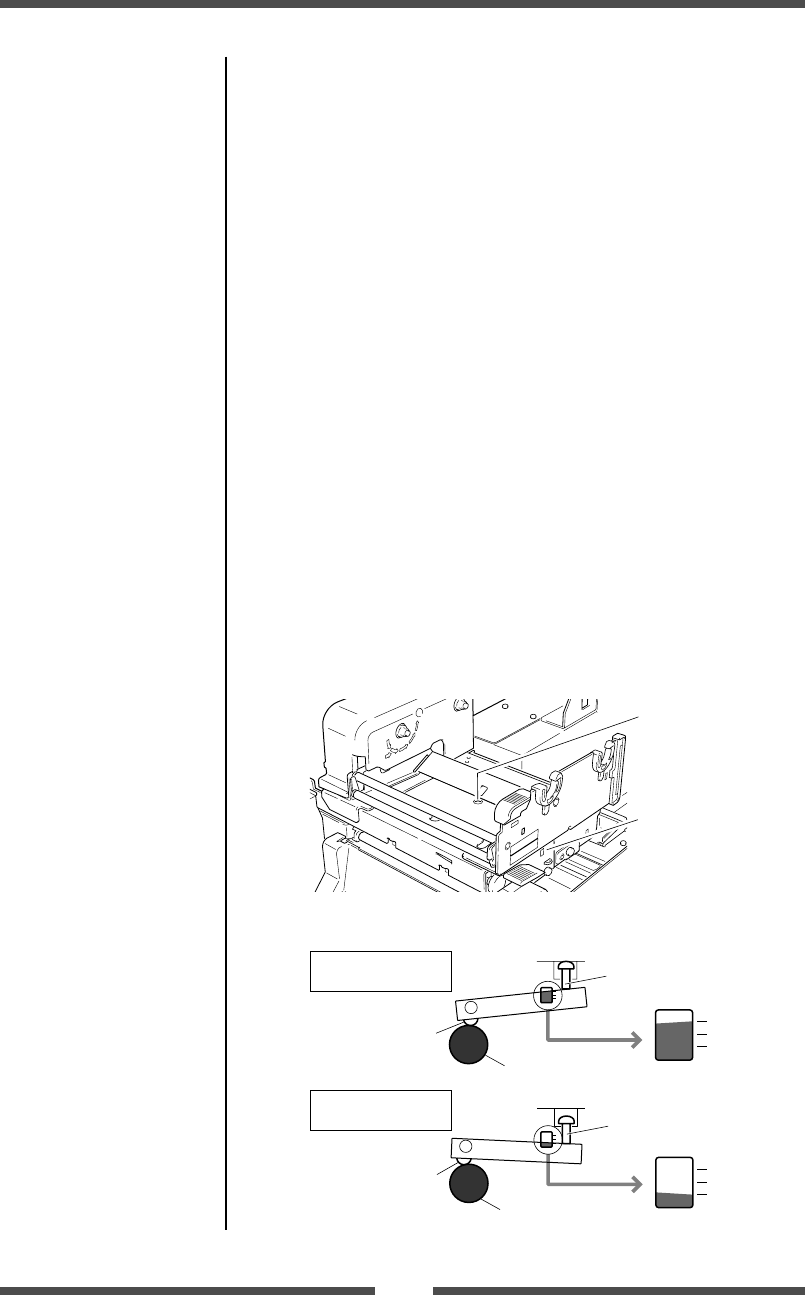
The relationship between the printhead heating element
and the media thickness check window is shown below:
Printhead
heating element
Printhead
heating element
Printhead position
for labels
Media thickness check window
Media thickness check window
a
b
Printhead position
for tags
Media thickness
check window
Media thickness
adjustment screw
Media thickness
adjustment screw
Platen
Platen
Self Print Mode (p.36)