Disassembly
Removing the LCD Assembly 2 - 19
2.Disassembly
Removing the LCD Assembly
1. Turn off the computer and remove the battery (page 2 - 8), HDD (page 2 - 9), memory (page 2 - 10), CD device
(page 2 - 12), Bluetooth module (page 2 - 14), WLAN module (page 2 - 15), processor (page 2 - 16) and the key-
board and center cover (page 2 - 18).
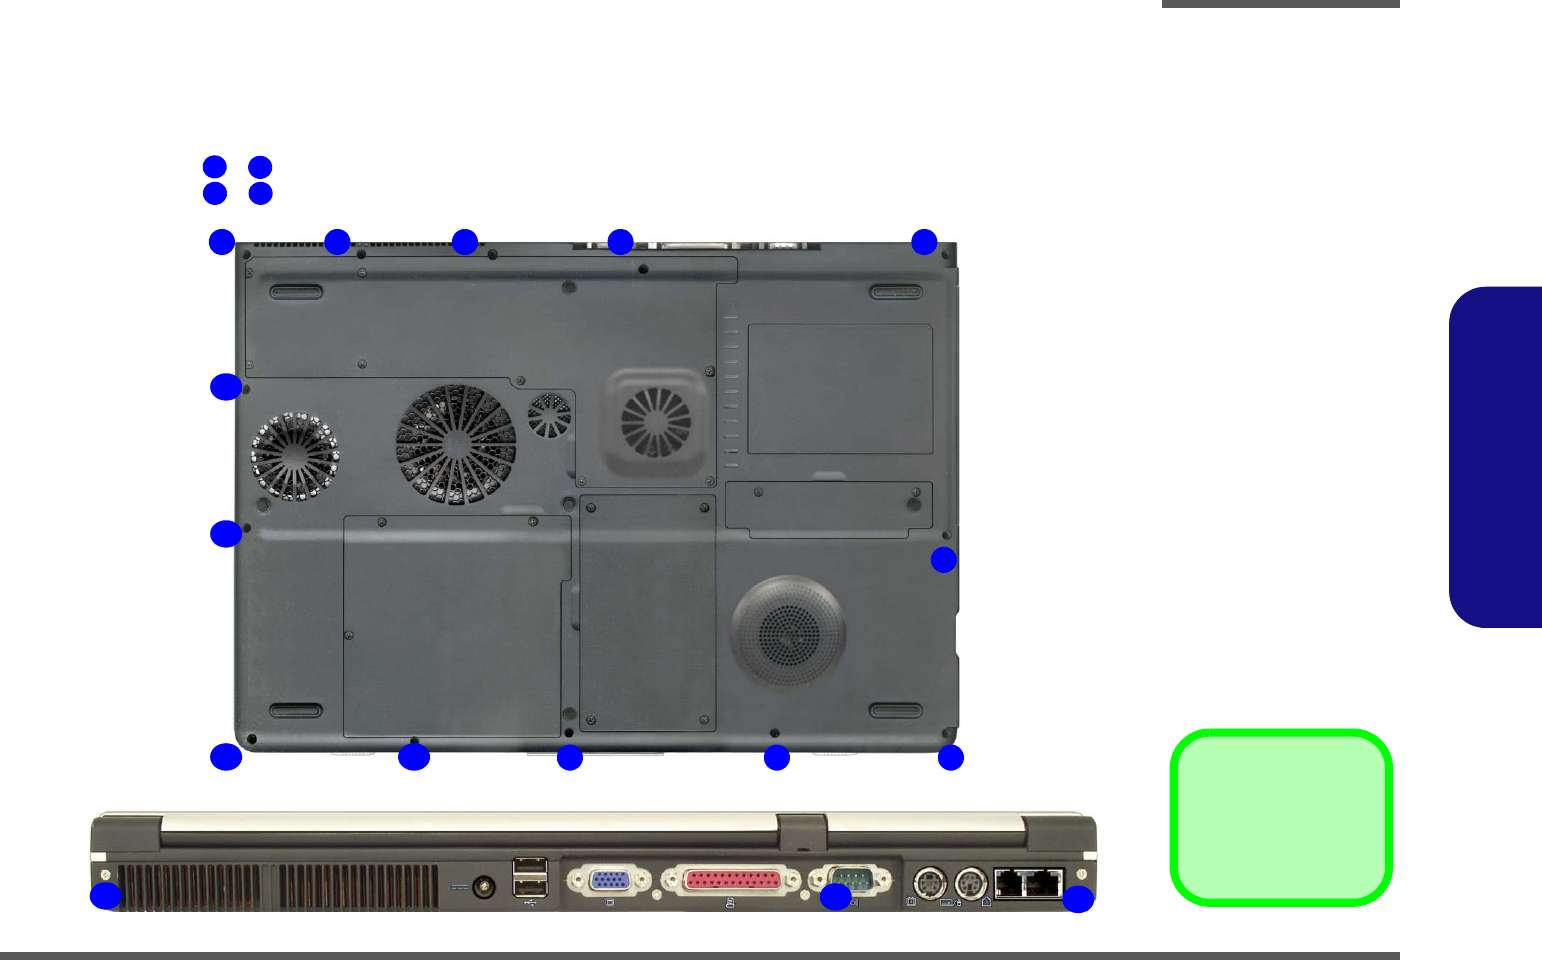
2. Remove screws - from the bottom of the computer
.
3. Remove screws - from the rear of the computer.
1
13
14 17
Figure 12
LCD Assembly
Removal
a. Remove the screws from
the bottom of the compu-
ter.
b. Remove the screws from
the rear of the computer.
•17 Screws
a.
11
13
10 8
1 54
6
7
2
b.
12
2
9
14
16
17


