Disassembly
2 - 30 Removing the LCD Panel
2.Disassembly
Removing the LCD Panel
1. Turn off the computer and remove the battery (page 2 - 8), HDD (page 2 - 9), memory (page 2 - 10), CD device
(page 2 - 12), Bluetooth module (page 2 - 14), WLAN module (page 2 - 15), processor (page 2 - 16), keyboard
and center cover (page 2 - 18), LCD assembly (page 2 - 19), top case module (page 2 - 21) and inverter (page 2
- 29).
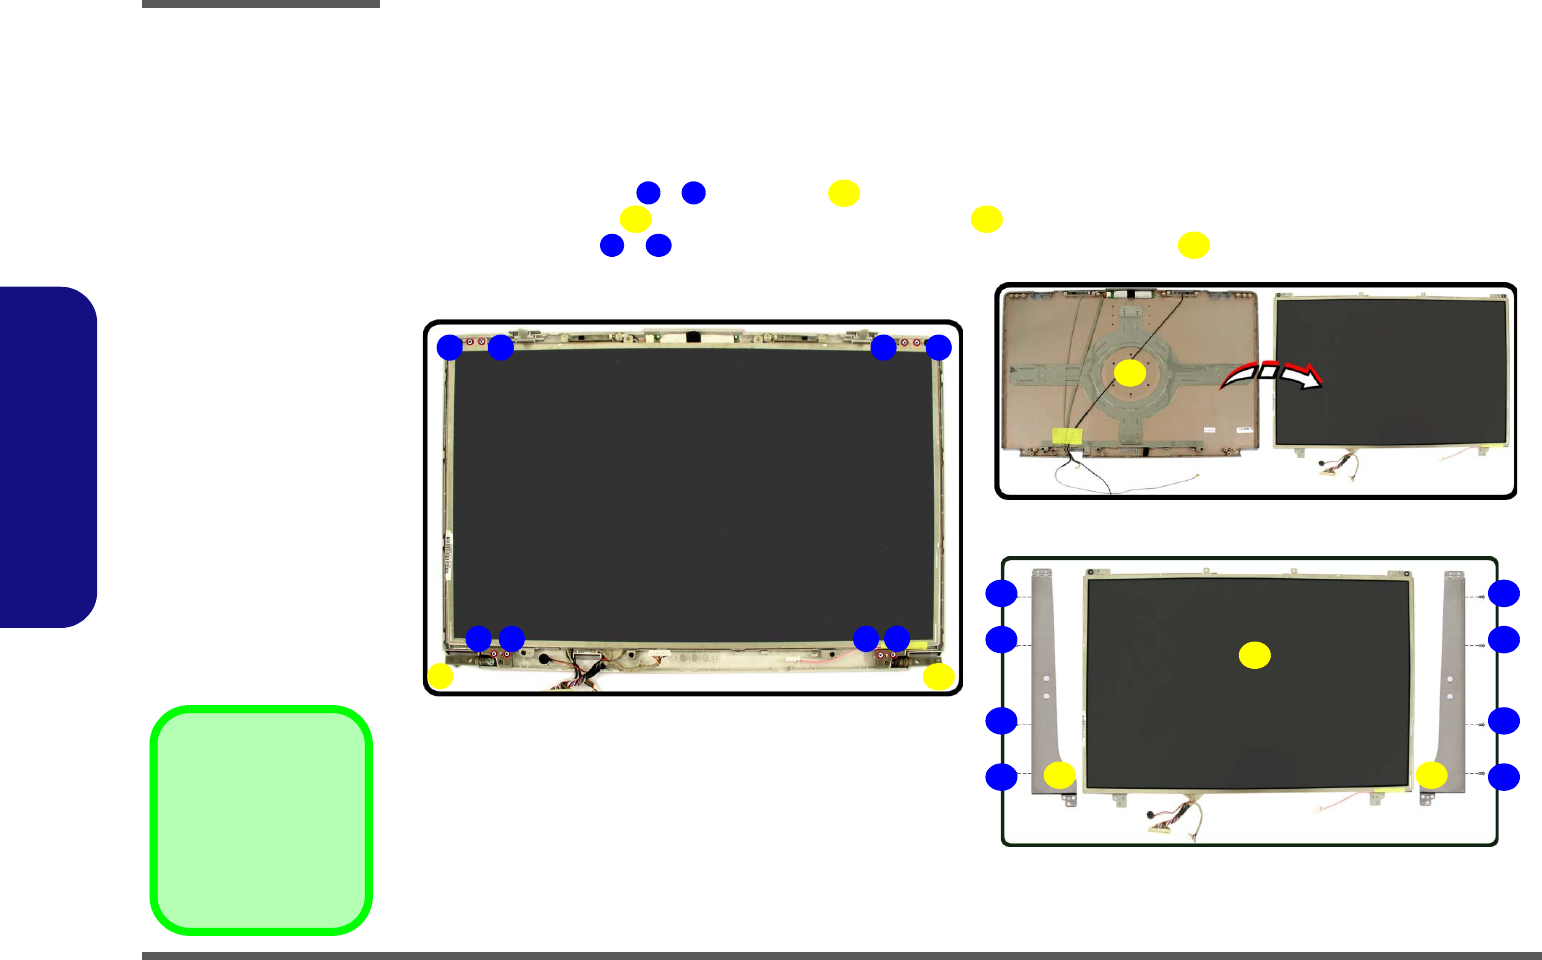
2. Remove the screws - and hinges from the front of the LCD assembly.
3. Lift the LCD panel out from the rear panel module .
4. Remove screws - from the LCD brackets, then separate the brackets from the LCD panel.
Figure 23
LCD Panel Removal
a. Remove the screws and
hinges.
b. Separate the LCD and
the rear panel.
c. Remove the LCD brack-
ets.
1 8 9
11 10
12 19
9. Hinges * 2
10. Rear Panel Module
11. LCD Panel
20. LCD Brackets * 2
•16 Screws
20
a.
1 2
9
3 4
5 6 7
c.
12
9
b.
8
10
11
13
14
15
19
18
17
16
20 20


