


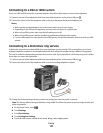
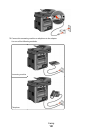
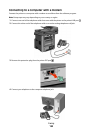
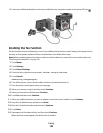

5 Connect an additional telephone cord (not provided) from the computer modem to the printer EXT port .
Enabling the fax function
The fax function must be enabled prior to use. If you disabled the fax function when setting up the printer for the
first time or if the printer has been off for an extended time, then follow these steps:
Note: Before completing these instructions, make sure the fax cables are connected. For more information, see
“Choosing a fax connection” on page 125.
1 Touch Menus.
2 Touch Settings.
3 Touch General Settings.
4 Touch the left or right arrow next to Run initial setup to select Yes.
5 Touch Submit.
Submitting changes appears.
6 Turn off the printer, connect the fax cables, and then turn the printer back on.
7 From the printer control panel, select your language.
8 Select your country or region, and then touch Continue.
9 Select your time zone, and then touch Continue.
10 Touch Fax, and then touch Continue.
11 Select any additional buttons you want to display on the home screen, and then touch Continue.
12 Enter the Fax Station Name, and then touch Enter.
13 Enter the Fax Station Number, and then touch Continue.
14 Touch Enter.
15 If prompted, set the date and time, and then touch Continue.
When the home screen appears, the fax function is enabled.
Faxing
135