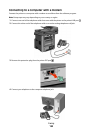
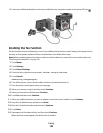
For Mac OS X version 10.4 or later users
1 With a document open, choose File > Print.
2 From the PDF pop-up menu, choose Fax PDF.
3 Type the fax number in the To field, and enter other information as needed.
4 Click Fax.
If you receive an error, "No fax modems were found", follow these directions to add your printer as a fax:
a From the Printer pop-up menu, choose Add Printer.
b Select the printer from the dialog that appears.
c From the Print Using pop-up menu, choose Select a driver to use.
d From the list, choose your printer fax model, and then click Add.
Creating shortcuts
Creating a fax destination shortcut using the Embedded Web
Server
Instead of entering the entire phone number of a fax recipient on the printer control panel each time you want to
send a fax, you can create a permanent fax destination and assign a shortcut number. A shortcut can be created to
a single fax number or a group of fax numbers.
1 Type the printer IP address into the address field of your Web browser.
Note: If you do not know the IP address of the printer, then print a network setup page and locate the IP address
in the TCP/IP section.
2 Click Settings.
3 Click Manage Shortcuts.
Note: A password may be required. If you do not have an ID and password, get one from your system support
person.
4 Click Fax Shortcut Setup.
5 Type a unique name for the shortcut, and then enter the fax number.
To create a multiple-number shortcut, enter the fax numbers for the group.
Note: Separate each fax number in the group with a semicolon (;).
6 Assign a shortcut number.
If you enter a number that is already in use, then you are prompted to select another number.
7 Click Add.
Faxing
138


