


3.
A quick dial number is automatically assigned by the printer. If you want to change the quick dial
number, use the left and right Arrow buttons or the keypad to scroll to the quick dial number
for which you want to specify a contact.
4.
NOTE: Number 01 through 89 are available for individual speed dial contacts.
When the quick dial number you want to use is shown on the display, use the keypad to enter the fax
number, and then press the Select button .
5.
Using the keypad, enter the name for the contact.
Find the number button that corresponds to the letter you want to enter, and press it repeatedly
until the correct letter appears.
a.
Press the right Arrow button to move to the next character space, or wait two seconds for
the text to be accepted.
b.
6.
NOTE: To enter a space between words, press the right Arrow button twice.
Repeat the previous steps until you are finished entering text.c.
NOTE: To delete a character, press the left Arrow button .
Press the Select button .7.
The contact is saved.
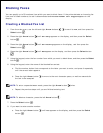
Creating a Group Dial List From the Operator Panel
From the main menu, use the left and right Arrow buttons to scroll to Fax, and then press the
Select button .
1.
Press the right Arrow button until Phone Book appears on the display, and then press the Select
button .
2.
Press the right Arrow button until Add appears on the display, and then press the Select button
.
3.
A quick dial number is automatically assigned by the printer. To specify you want to enter a group, use
the left and right Arrow buttons or the keypad to scroll to the group contact quick dial number
to which you want to assign contacts.
4.
5.