88 Installing System Components
3 Rotate the hard-drive carrier out of the system. See
"Rotating the Hard-Drive Carrier Out of the
System" on page 44
.
4
Remove the card and front fans. See "Replacing the Card and Front Fans" on page 83.
5
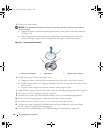
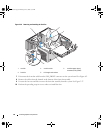
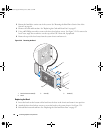
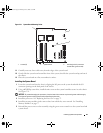
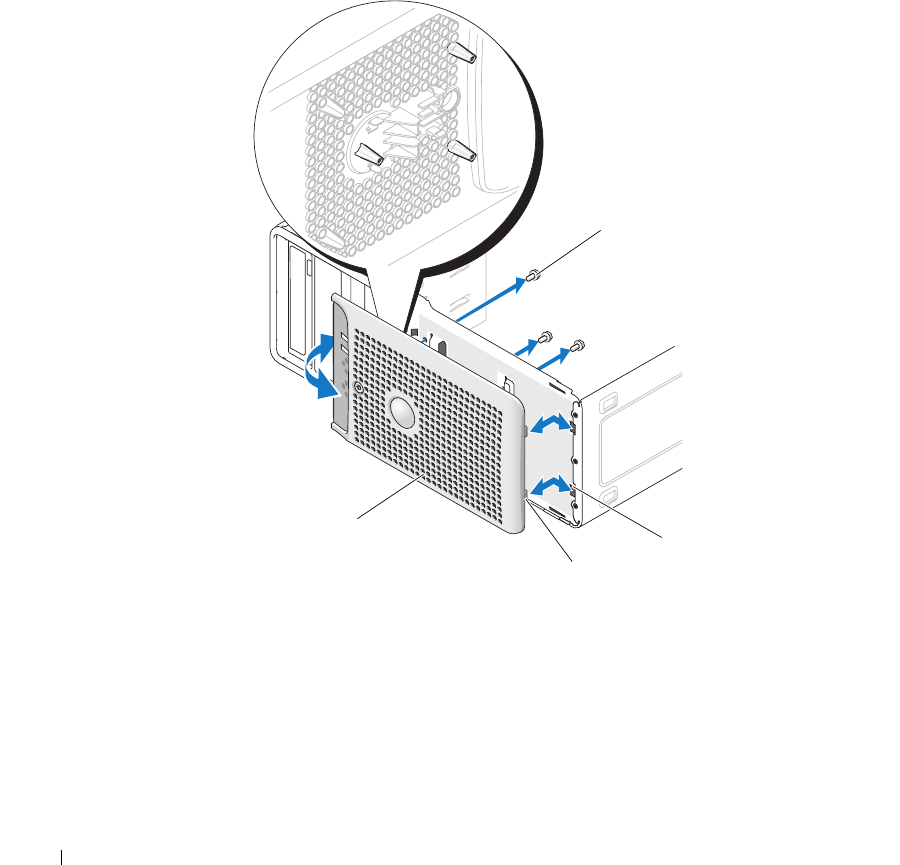
Using a #2 Phillips screwdriver, remove the three bezel release screws. See Figure 3-29. To remove the
lower screw, angle the screwdriver over the top of the CPU1 heat sink, if populated.
6
Rotate the top of the bezel away from the system chassis and remove it.
Figure 3-29. Removing the Bezel
Replacing the Bezel
1
Insert the hooks on the bottom of the bezel into the slots in the chassis and rotate it into position.
2
Attach the three bezel release screws to secure the bezel to the system chassis. See Figure 3-29.
3
Reinstall the front and card fans. See "Replacing the Card and Front Fans" on page 83.
1 bezel release screws (3) 2 slots (2) 3 hooks (3)
4 bezel
1
4
2
3
book.book Page 88 Monday, June 5, 2006 1:51 PM


