


51
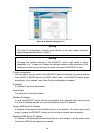
You have to perform the following steps in order to enable Dynamic DNS:
• Make sure that the LAN interface of the DKVM-IP1 switch is properly configured.
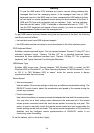
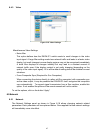
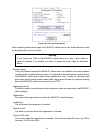
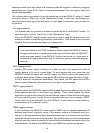
• Enter the Dynamic DNS Settings configuration dialog as shown in Figure 6-20.
• Enable Dynamic DNS and change the settings according to your needs (see below).
Enable Dynamic DNS
This enables the Dynamic DNS service. This requires a configured DNS server IP
address.
Dynamic DNS server
This is the server name where DKVM-IP1 switch registers itself in regular intervals.
Currently, this is a fixed setting since only dyndns.org is supported for now.
Hostname
This is the hostname of the DKVM-IP1 switch that is provided by the Dynamic DNS
Server. (use the whole name including the domain, e.g. testserver.dyndns.org , not just
the actual hostname).
Username
You have registered this username during your manual registration with the Dynamic
DNS Server. Spaces are not allowed in the Nickname.
Password
You have used this password during your manual registration with the Dynamic DNS
Server.
Check time
The DKVM-IP1 switch registers itself for initiating the IP address of DKVM-IP1 stored in
the Dynamic DNS server at this time.
Check interval
This is the interval for reporting again to the Dynamic DNS server for updating the IP
address associated with the Domain Name of the DKVM-IP1 switch.
Warning
The DKVM-IP1 switch has its own independent real time clock. Make sure the time
setting of the DKVM-IP1 switch is correct. (see the Section called Date And Time )