6. No sound
Make sure the Mute option in Audio menu is off.
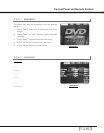
Make sure the Audio menu in DVD player's OSD is set properly.
Make sure the Internal/External speaker option in audio menu is set as required.
Make sure the channel of wireless transmitter selected in projector is the same
as the channel of wireless receiver selected in the wireless speaker.
7. Wireless speaker noisy
Change the channels on the projector and wireless speaker simultaneously.
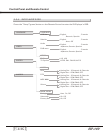
There are 8 channels selectable.(refer to the Section 3-2-2-4)
8. Remote control does not work
Install new batteries.
Make sure there are no obstacles between you and the projector's receivers.
Make sure you are attempting to operate it within its usable range.
9. Can't read the memory card
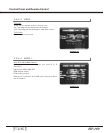
Make sure the Media Player's LED indicator (beside the card slot) is lighting..
Check the compatibility of memory card (refer to section 2-3-2)
Re-insert the memory card.
10. Can't play DVD
Make sure the DVD player's LED indicator (on the control panel of the projector)
is lighting
Confirm that the disc is an original edition.
Eject the disc and play again.
11. The disc can't play or is automatically ejected after loading
Make sure the disc is free from dirt and dust and is not damaged.
Make sure the disc is loaded with the label side face-up and aligned properly in
the disc tray guide.
Make sure the disc format is compatible with the DVD player of the projector.
Please refer to the specification.
12. The color of Image is not correct
Please reset all settings.
APPENDICES APPENDICES
4-2-1 REPLACING THE LAMP
4-2 MAINTENANCE
When the lamp's total working time accumulates to over 1850 hours, the on-screen
display (OSD) will deliver a message recommending that you replace the lamp. Please
contact a service center to replace the lamp as soon as possible, or refer to the
following instructions to replace it yourself.
TO REPLACE THE LAMP
1. Turn off the projector by pressing the "Power" button
2. Allow the projector to cool down for at least one hour.
3. Switch off the power and disconnect the power cord.
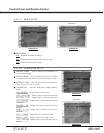
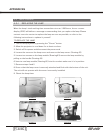
4. Loosen the screw on the lamp cover and remove the lamp cover. (Drawing 62)
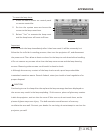
5. Loosen two screws on the lamp module (Drawing 63) remove the lamp module by
pulling on the handle (Drawing 64)
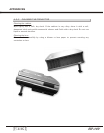
6. Insert a new lamp module (Drawing 65) into the socket: make sure it is in position.
7. Reverse steps 4 and 5
8. Ensure that the lamp cover is securely attached and flush with the bottom of the unit.
The unit will not operate with the cover incorrectly installed.
9. Reset the lamp timer
DRAWING 63DRAWING 62
DRAWING65DRAWING 64


