


90 Setting Up Network Projection
Connecting to a Wired Network
With the optional Ethernet unit, you can connect the projector to
your network and configure it with an IP address. This provides an
alternative to connecting to the projector wirelessly.
1. Remove the wireless module and cover plate, as described above,
then insert the Ethernet unit into the projector and replace the
cover plate.
2. Connect the projector to your network using a commercially
available 100BaseTX or 10BaseT network cable. Connect the
cable to the
LAN port on the projector.
3. Point the remote control at the projector and press the P
Power
button.
4. Press the
EasyMP button on the remote control to select EasyMP
as the source.
5. Press the
Menu button on the remote control, select the
Network menu, then press Enter.
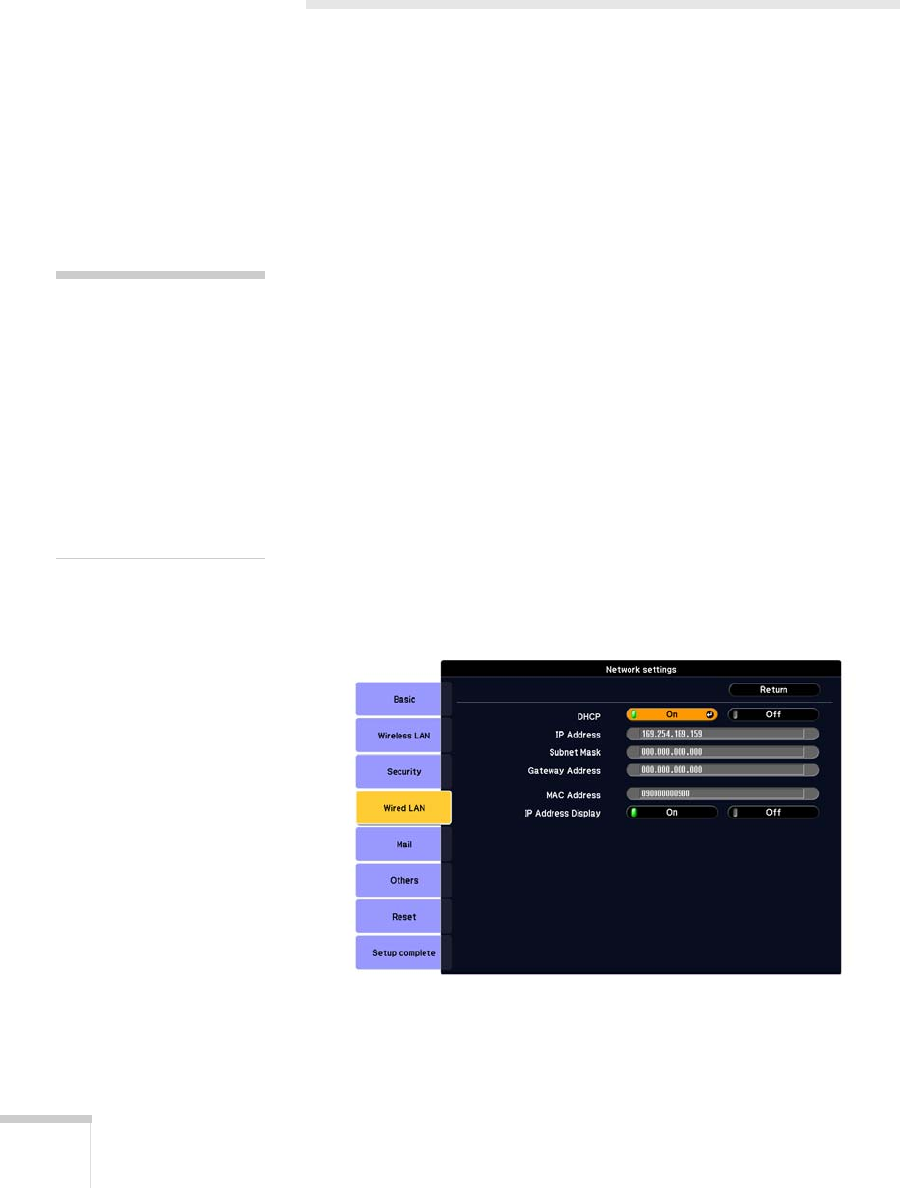
6. Choose
Network Configuration and press Enter.
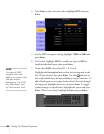
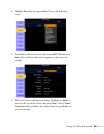
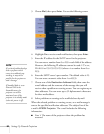
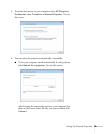
7. Choose
Wired LAN and press Enter. You see the following
screen:
8. Do one of the following:
note
Only the Epson Ethernet
unit is guaranteed to work.
Other brands may not be
compatible.
If you see a message asking
you to insert a LAN or
memory card, check to make
sure your Ethernet unit is
p
roperly inserted.