


Fine-Tuning the Projector 53
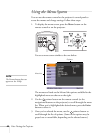
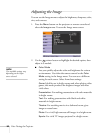
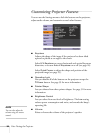
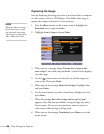
2. Use the pointer button to highlight the desired option, then
adjust it as needed:
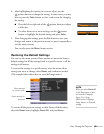
■ Auto Setup
Leave this setting
On to automatically optimize computer
images. Turn it off if you want to save adjustments you have
made to the Tracking, Sync, and Position settings.
■ Tracking
Adjust this value to eliminate vertical stripes in computer
images.
■ Sync
Adjust this value if computer images appear blurry or flicker.
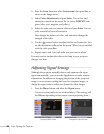
■ Progressive
For composite video and S-video only. Turn this setting On
to convert interlaced signals into progressive signals (best for
still images). Leave the setting
Off for moving images.
■ Position
If the image is slightly cut off on one or more sides, it may not
be centered exactly. Select this setting and use the pointer
button to center it.
■ Computer1 Input
Computer2 Input
If the colors don’t look right on the Auto setting, select the
setting for the type of equipment you’ve connected to the
Computer1 or Computer2 port:
RGB: For a computer or RGB-video connection.
Component: For a video player that outputs a component
video signal (with connectors labeled Y/Cb/Cr or Y/Pb/Pr).
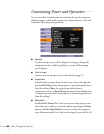
■ Video Signal
Leave this setting at
Auto unless you are using a 60-Hz PAL
system (then select
PAL60).
■ Resize
Choose an aspect ratio of either 4:3 or 16:9. For videos, you
can also select
16:9 (Up) or 16:9 (Down) to accommodate
subtitles or supertitles.
Normal is the default setting for a
computer connection.
note
You can also use the remote
control’s
Auto button to
automatically reset the
p
rojector’s Tracking, Sync,
and Position settings. See
p
age 81 for details.