


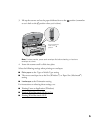


13
Note: Not all of these settings may be available, depending on the current Copy
mode setting.
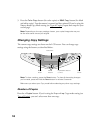
Reduce or Enlarge
Press the right Menu button until you see Reduce/Enlarge on the LCD screen.
Then press the + or –Value buttons to enlarge or reduce your document to fit on the
paper you loaded. Or select Auto Fit Page to have the EPSON Stylus CX5400
automatically determine the necessary reduction or enlargement.
To reduce or enlarge by a precise percentage, press the right
Menu button until you
see
Zoom In/Out on the LCD screen. Then press the + or –Value buttons to select a
percentage of the scanned image for the resulting print.
Note: If you select Auto Fit Page as the Reduce/Enlarge setting to copy a
document with white or very light colored edges, the original size may not be
recognized correctly, creating an incorrect size copy. If this occurs, select 100%
as the Reduce/Enlarge setting and use the Zoom In/Out setting to adjust the size
of your copy.
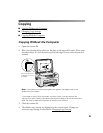
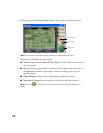
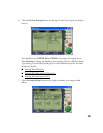
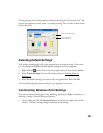
Copying With the Computer
Follow these steps to use EPSON Smart Panel
TM
to copy with your computer.
Note: Some features, such as PhotoEnhance
TM
and Sepia, are only available
when copying from the computer.
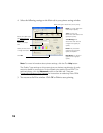
1. Make sure the EPSON Stylus CX5400 is on and paper is loaded in the sheet
feeder.
2. Place the document face-down on the glass, in the top, left corner as described in
Copying Without the Computer.
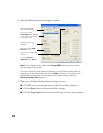
3. Select the
EPSON Smart Panel icon on your desktop or press the Scan button
on the EPSON Stylus CX5400 to open Smart Panel. (To change the application
assigned to the
Scan button, see One-Touch Scanning.)
Note: You can also open EPSON Smart Panel in Windows by selecting Start >
All Programs
or Programs > EPSON Smart Panel > EPSON Smart Panel.
On Macintosh, you can open Smart Panel from the Applications folder.