


1 • Setting Up the Projector
52
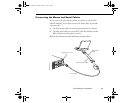
4. Connect the other plugs on the audio/video cable to the Audio
jacks of the projector: insert the white plug into the L jack and the
red plug into the R jack. Connect the plug at the other end of the
audio/video cable to the audio output jacks of the video source.
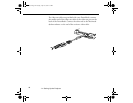
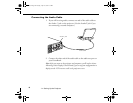
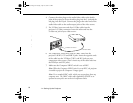
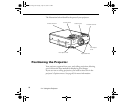
5. For S-Video, insert one end of an S-Video cable into the
projector’s S-Video connector. Insert the other end into the
S-video-out jack of your video source.
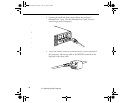
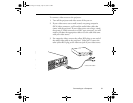
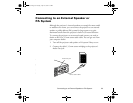
6. For component, insert three ends of a BNC cable into the
projector’s R/R-Y, G/Y and B/B-Y jacks. Insert the opposite ends
of the cable into the Y/Video, C/R-Y, and B-Y jacks on your
component video source. (Don’t insert any of the cable ends into
the HD/Sync and VD jacks.)
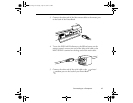
7. Make sure the Computer 2/BNC switch is set to BNC.
Note: When the Computer 2/BNC switch is set to BNC, the projector
is unable to project the Computer 2 image signal.
Note: Use a standard BNC cable, which you can purchase from any
computer store. The 5BNC video cable supplied by EPSON as an
optional accessory does not work with component video.
S-Video cable
S-Video connector
5300.book Page 52 Tuesday, April 13, 1999 4:19 PM