


90 Presenting from a Memory Card, Digital Camera, or External Drive
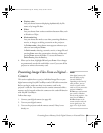
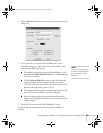
4. Select EasyMP as the source by pressing the
EasyMP button on
the remote control. If your camera complies with the DCIM
standard, you’ll see a
DCIM folder appear on the EasyMP
CardPlayer screen.
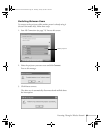
5. Use the pointer button on the remote control to position the
cursor on the folder and press
Enter.
6. Select
Open Folder in the drop-down menu. When the folder
opens, you see another folder with your manufacturer’s name.
7. Position the cursor on the folder and press
Enter.
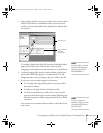
8. Select
Open Folder. You see your image files when the folder
opens.
9. Position the cursor on the image file you want to project and press
Enter.
10. Select
View Image. The image is projected on the screen. If you
want, you can press a side of the pointer button to rotate the
image while you’re viewing it.
To end the slideshow, press the
Esc button on the remote control,
then select
Exit and press Enter.
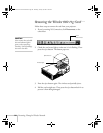
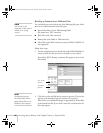
Presenting Image Files From an
External Drive
This section explains how to project individual image or movie files
from an external hard drive or flash memory drive using EasyMP and
a USB connection.
Before you begin, make sure there is no memory card in the
projector’s card slot. You cannot have a drive connected while a
memory card is inserted; neither the drive nor the card will function
with EasyMP.
Follow these steps:
1. Connect your external hard drive or flash memory drive (see
page 46).
note
Make sure your camera
shows up on your desktop as
a drive letter. If it does, it is
probably a USB mounted
device and will work with
the projector software. The
EasyMP software does not
support TWAIN-compliant
digital cameras.
If your camera’s memory
card is supported by the
projector, you can insert it
into the projector’s card slot
and project your images (see
“Creating a Slideshow on the
Fly” on page 87). You can’t
have your camera connected
at the same time.
Banff-Toronto User's Guide.book Page 90 Thursday, January 20, 2005 5:00 PM