


Presenting from a Memory Card, Digital Camera, or External Drive 93
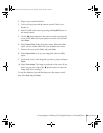
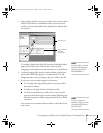
5. When you see a message that the slideshow is complete, left
mouse-click or press
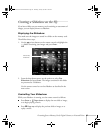
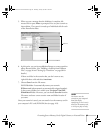
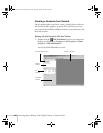
Enter as prompted. You see your scenario as
shown below. The scenario is made up of individual cells for each
of the PowerPoint slides.
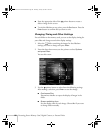
6. At this point, you can insert additional images or create transition
effects between slides. (See “Building a Scenario from Different
Files” on page 96 and “Setting Up Transitions” on page 98 for
details.)
If there are slides in the scenario that you don’t want to use,
right-click those cells and select
Inactivate.
7. Choose
Save from the File menu.
EMP SlideMaker 2 automatically names your scenario
SCNnnnn.sit (where nnnn is an automatically assigned number).
It also creates a folder for it within your \Program Files\EMP
SlideMaker2
folder. However, you can choose Save As from the
File menu and enter a new scenario name and folder location if
you want.
Once your scenario is saved, you can transfer it to the memory card in
your computer’s PC card (PCMCIA) slot (see page 101).
Scenario
Cell
note
You have to save the
scenario on your computer’s
hard drive before
transferring it. Don’t save it
directly to the memory card,
or it may not play correctly.
Banff-Toronto User's Guide.book Page 93 Thursday, January 20, 2005 5:00 PM