


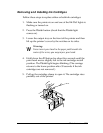
Removing and Installing Ink Cartridges
Follow these steps to replace either or both ink cartridges:
1. Make sure the printer is on and one of the
Ink Out
lights is
flashing or turned on.
2. Press the
Pause
button (check that the
Pause
light
comes on).
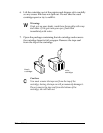
3. Lower the output tray on the front of the printer and then
lift up the printer’s cover by the notches on its sides.
w
Warning:
Never insert your hand in the paper path beneath the
center of the cover; you may injure your hand.
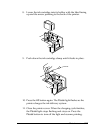
4. Hold down the
Alt
button for about five seconds until the
print head moves slightly left to the ink cartridge install
position. The
Pause
light begins blinking. (The carriage
returns to the home position after 30 seconds if the ink
cartridges are not removed.)
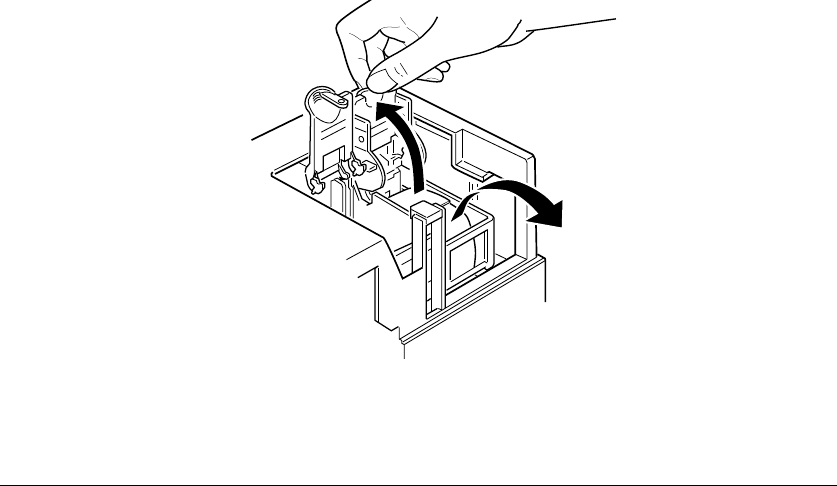
5. Pull up the cartridge clamp to open it. The cartridge rises
partially out of the printer.
Maintenance
3-5