Keep the screw to secure the option card to the computer. Store
the slot cover in a safe place in case you remove the option card
later.
2.
Unpack the option card and adjust any switches or jumpers on it
if necessary. (Check the option card instructions to see if this is
necessary.) When you handle the card, be careful not to touch
any of the contacts on the circuit board, especially the gold-edged
connector pins. If you need to set it down before you install it,
place it gently on top of its original packing material with the
component side facing up. Keep the packing materials in case you
remove the card later.
3.
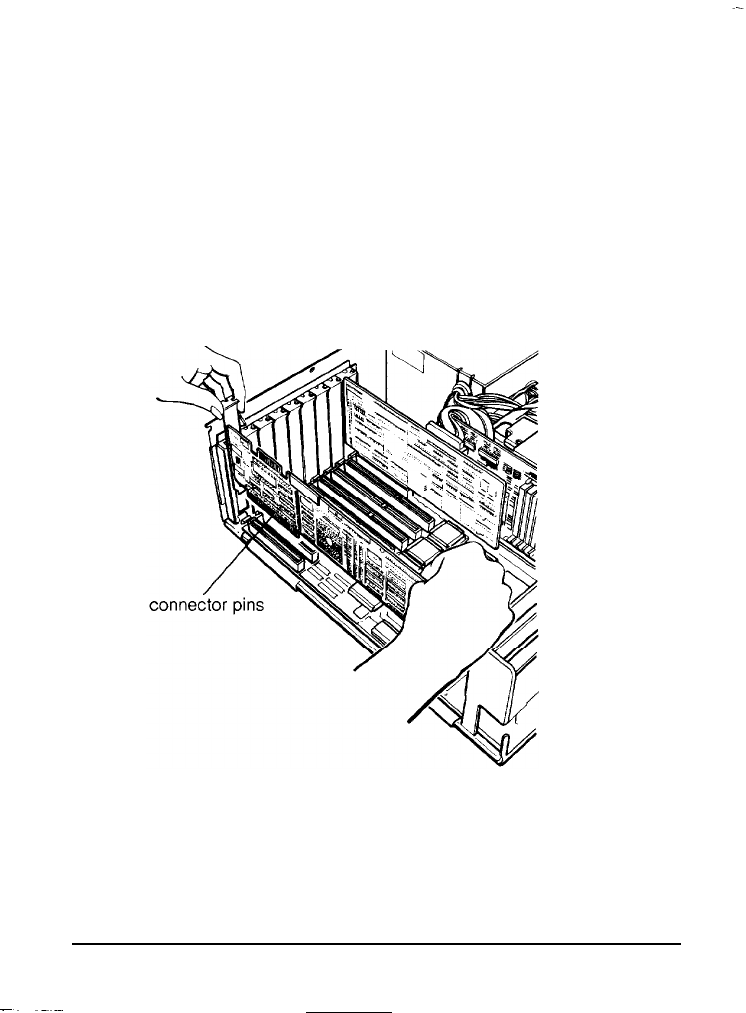
Grip the card by the top corners and position it at the top of the
slot, as shown below. Make sure the connector pins point down
and the component side faces the power supply inside the
computer.
4.
Insert the card in the slot, guiding it straight down. Once the
connector pins reach the connector slot, as shown in the
following illustration, push the card downward firmly (but
carefully) to fully insert it. You should feel the card fit into place.
6-8 Installing Options


