2.
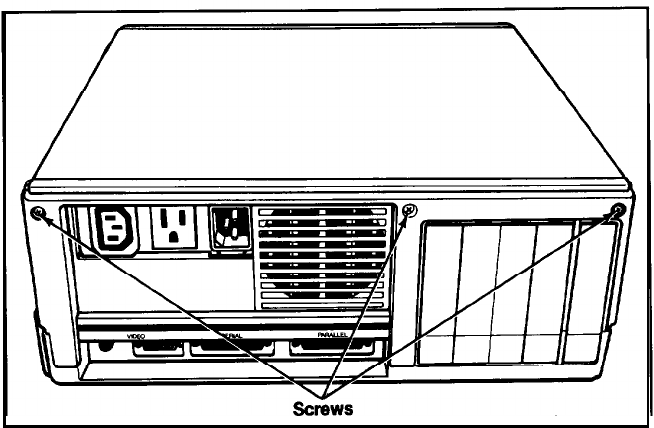
As shown in Figure
4-1,
the back panel is secured with three screws.
Remove the screws with a Phillips screwdriver and put them safely
to one side. Then remove the back panel from the main unit and set it
aside.
Figure 4-1. Back panel screws
3.
The top cover is secured by four screws, two on each side of the
computer. Locate the small plastic inserts that cover the two screws
on the left side, as shown in Figure
4-2.
Remove the plastic inserts
with a small screwdriver and set them aside. Then remove the screws
on both sides of the computer. Put all the screws safely to one side.
38


