


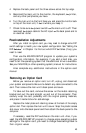

4. Replace the back panel and the three screws across the top edge.
5.
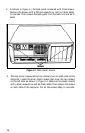
Reconnect the main unit to the monitor, the keyboard,
the
printer,
and any other peripherals you have.
6.
Turn the main unit so the front faces you and place the monitor back
on top of the main unit, if
that
is where you keep it.
7.
Check to be sure the power switch on the main unit is off. Then
reconnect
the
power cable to the AC input
on
the back panel and to
an electrical outlet.
Post-Installation Adjustments
After you install an option card, you may need to change some DIP
switch settings to match your new system configuration. See “Setting the
DIP
Switches”
in Chapter
1
to find out which DIP switches (if any) you
need to reset.
Then use the MS-DOS SETUP program to update your system’s
configuration information. For example, if you add a hard disk, you
need to tell the operating system that the additional drive is available.
See your MS-DOS (or other operating system) manual for instructions.
Also complete any additional instructions in the option card
manual.
Removing an Option Card
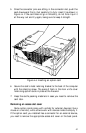
Before you remove an option card, turn off, unplug, and disconnect
your system components. Be sure to detach any cable connected to the
card. Then remove the main unit’s back panel and cover.
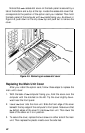
To take out the card, remove the screw on the metal retaining
bracket and pull the card straight up and out of the connector. Then
carefully wrap the card, preferably with the original packing materials,
and place it inside its box for safe storage.
Replace the metal plate and retaining screw at the back of the empty
option slot. Then replace the main unit’s cover. Snap the plastic access
slot cover onto the back panel and then attach the back panel to the
computer.
If necessary, reset the DIP switches on the main unit. Also, if you
used the MS-DOS SETUP program to change some operating system
settings for the option card, you need to change these settings back to
their original values.
43