


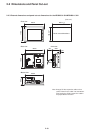


2-18
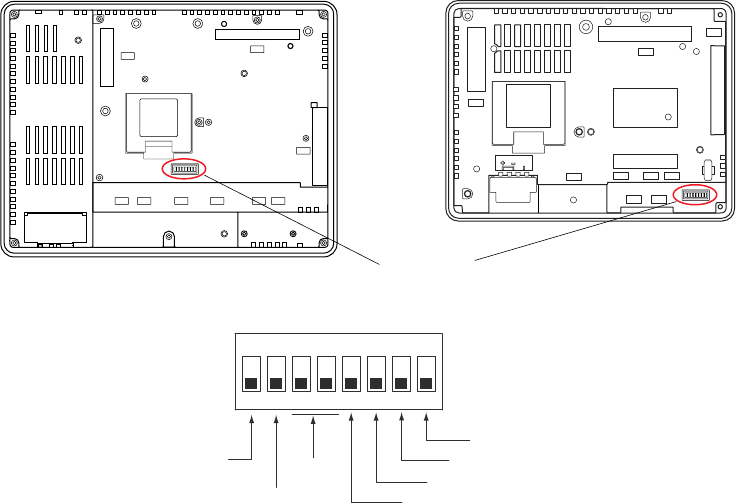
2-6 Dip Switches
In NP5M0101-5H4/4H4, NP5N0011-5H4/4H4, the dip switch is hidden by the controller unit.
Operate the dip switch by detaching the controller unit.
The @E.Terminal is equipped with eight (1 to 8) dip switches. When setting the dip switch, turn the power off.
Upon delivery, all the dip switches are set to OFF.
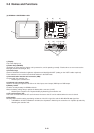
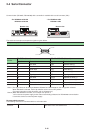
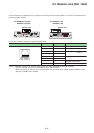
• For NP5M0101-5H4/4H4
NP5N0011-5H4/4H4
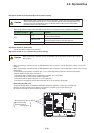
Rear view Rear view
LAN
U-B
U-A
CN1
24VDC
FG
CN5
CN7
CF
MJ1
MJ2
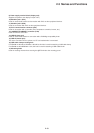
U-AU-B
LAN
CN1
MJ2
MJ1
CF
CN5
CN7
Dip switch
ON
12345678
CF auto-uploading
Not used
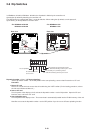
CF card interface cover
access control
MJ2 (modular jack 2) terminating resistor
CN1 +RD/-RD terminating resistor at pins 1 and 2
MJ1 (modular jack 1) terminating resistor
CN1 +SD/-SD terminating resistor at pins 3 and 4
Dip switch number 1 (Note: ) (CF Auto-uploading)
Set the dip switch number 1 to the ON position when auto-uploading a screen data file saved on a CF card.
Procedure
1. Have a CF card
Have a CF card to which the screen data is loaded using the V-SFT-5 editor. (For the loading procedure, refer to
the “V8 series Reference Manual.” )
2. Insert a CF card
Turn the power of the display unit off, and set the dip switch number 1 to the ON position. Open the CF card
interface cover, and insert a CF card.
3. Auto-uploading starts
Turn the power of the display unit on. The screen data is automatically loaded into the FLASH memory of the unit.
Note: Be sure to set the dip switch number 1 to the OFF position if you do not use CF auto-uploading function.
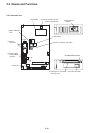
• For NP5M0101-3H4
NP5N0011-3H4