4-3
4-2 Battery Replacement
Battery replacement
• Battery replacement of display unit
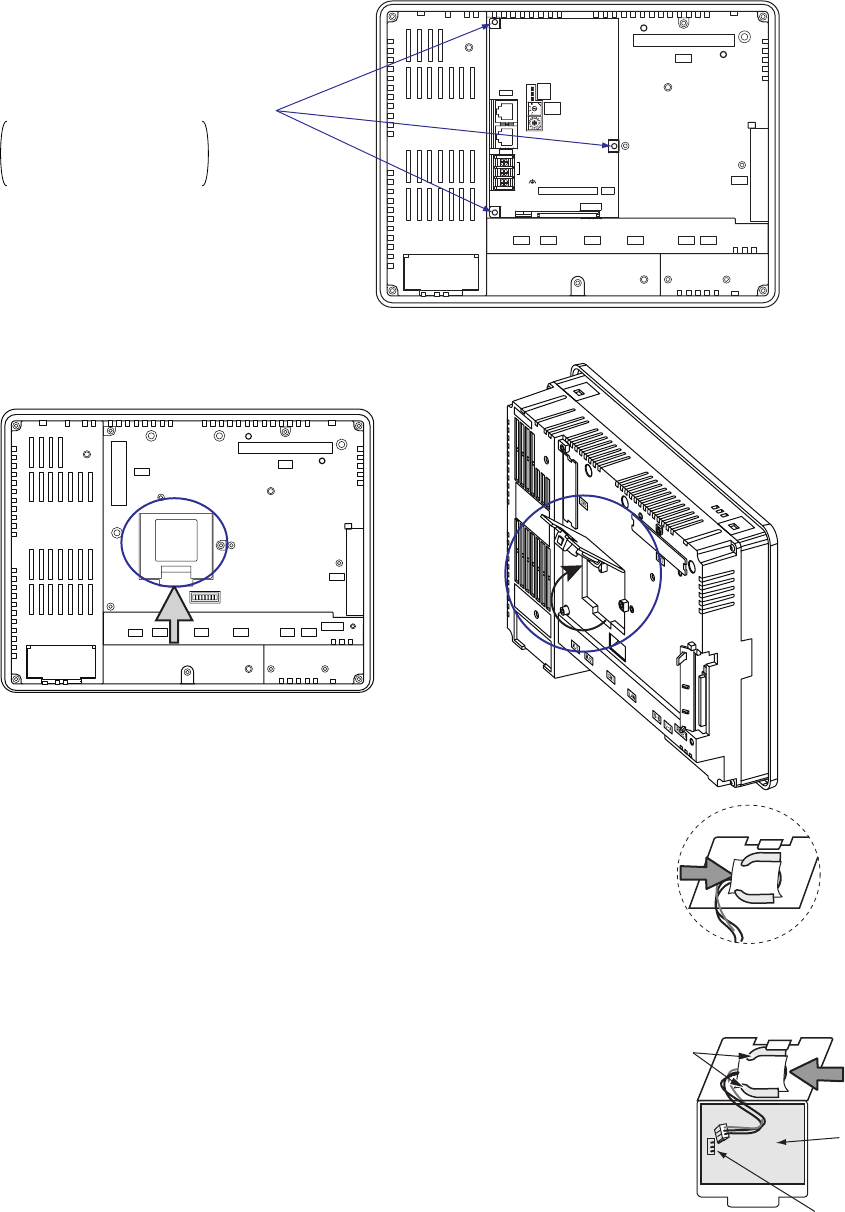
1) Remove the controller unit from @E.Terminal.
Remove mounting screws at three places to remove the controller unit from the display unit.
Be careful not to drop or lose the mounting screws.
U-AU-B
LAN
CN1
MJ2
MJ1
CF
CN5
CN7
4:RUN
3:U-TERM
2:TERM
1:STOP
ONL
ERR
UROM
RUN
ALM
BAT
No.
USB
LOADER
USER ROM CARD
CPU
SX-BUS
IN
OUT
24V DC
+
-
FG
Mounting screws at three places
M3 screws thread,
Tightening torque:
0.5 to 0.7N·m
2) Open the battery holder cover of the display unit in the direction of the arrow as shown in the left illustration below.
RESET
U-AU-B
LAN
CN1
MJ2
MJ1
CF
CN5
CN7
3) Remove battery connector, and slide battery to remove it from its socket, as shown in
the right figure.
4) Insert a new battery into the socket so that the red cable side of the new battery faces
the board and the cable is on the left side. Next, slide battery from the arrow key
direction shown in the right figure.
5) Connect the battery connector, and close the battery holder cover.
6) Attach the controller unit to the display unit and fix it with mounting screws at
three places.
Note: Replace the display unit battery “UG30P-BT” within three minutes after
the unit is turned off. If it is not possible to replace within three minutes,
make a backup copy of data in the SRAM.
Socket
Printed
circuit
board
Battery
connector
Battery holder


