


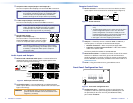
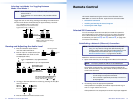
Selecting Lock Mode 2 or Toggling Between
Mode 2 and Mode 1
NOTE: If the switcher is in Lock mode 0 or mode 1, this procedure
selects mode 2.
If the switcher in in Lock mode 2, this procedure selects
mode 1.
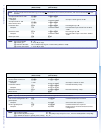
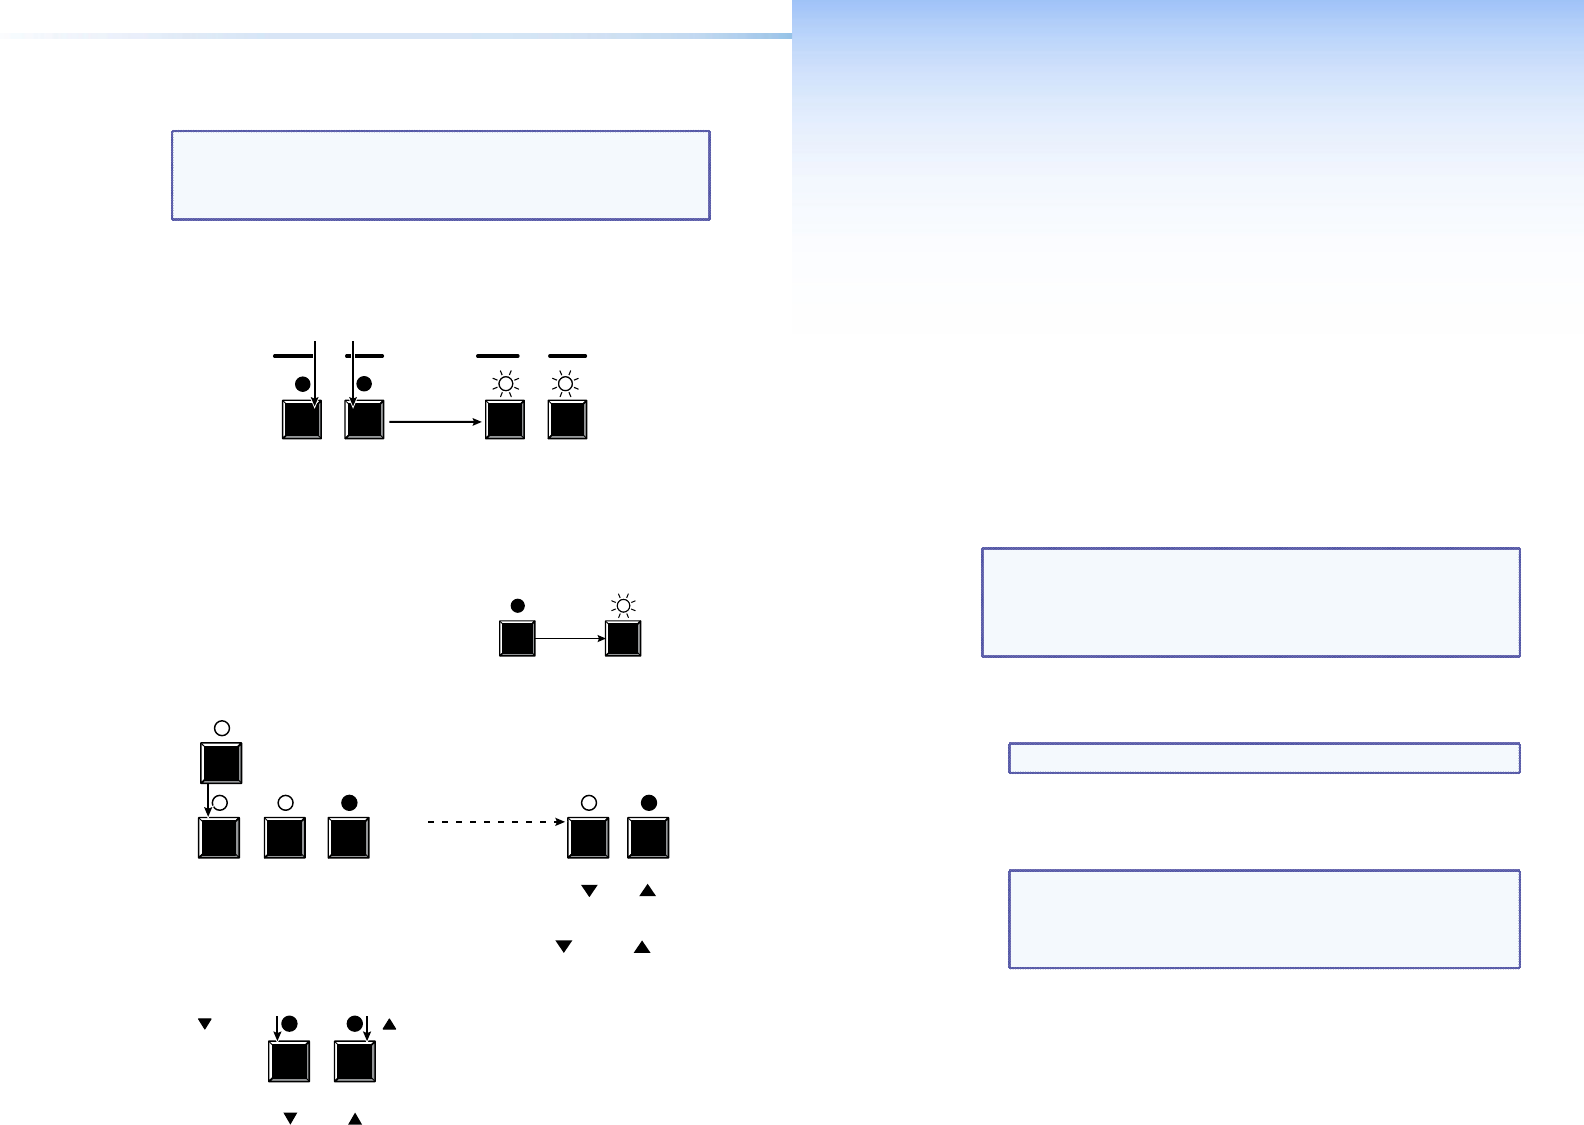
Toggle the lock on and off by pressing and holding the Video button
and the Audio button simultaneously for approximately 2 seconds.
Press and hold the Video and Audio buttons
simultaneously to turn on Lock mode 2 or to
toggle between mode 1 and mode 2.
2 seconds
The Video and Audio LEDs blink
twice to indicate the mode change.
Release the buttons.
VIDEO AUDIO
I/O
VIDEO AUDIO
I/O
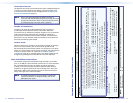
Viewing and Adjusting the Audio Level
1. Press and hold the Audio button
until the Audio LED flashes.
2. Press an input or output button (see
the MPX 866 A User Guide to read
the displayed value).
1 2 3
5
VIEW ESC
For the input level (gain/attenuation),
the View and Esc LEDs display the
polarity (attenuation [ ] or gain [ ]).
Press an input button to adjust gain/attenuation.
- or -
Press an output button to adjust the output volume.
Output LEDs display
gain or attenuation.
- or -
Input LEDs display
output volume level.
3. Increase or decrease the level or volume by pressing the Esc (
>
) or
View (
<
) buttons.
VIEW ESC
button
decreases
the level.
button
increases
the level.
4. Press and release the Audio button to exit.
Remote Control
This section describes using the remote control features of the
MPX 866 A to control the device. Topics that are covered include:
• Selected SIS Commands
• Installing and Starting the Control Program
• Accessing the HTML Pages
Selected SIS Commands
You can use Simple Instruction Set (SIS) commands for operation
and configuration of the switchers. You can run these commands
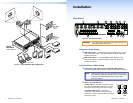
from a PC connected to any of the switcher’s three serial ports or
the Ethernet port (see item
j
, item
n
, and item
k
, on page 5 for
connection information).
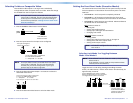
Establishing a Network (Ethernet) Connection
NOTE: The first time you connect to the switcher via the LAN
port, you may need to change the default settings (IP
address, subnet mask, and [optional] administrator name
and password) of the switcher (see "Configuring for
Network Communication" on page 24 for details).
Establish a network connection as follows:
1. Open a TCP socket to port 23 using the IP address of the switcher.
NOTE: The factory default IP address is 192.168.254.254.
The switcher responds with a copyright message including the
name, firmware version, and part number of the product, and the
current date and time.
NOTES: • If the switcher is not password-protected, the device
is now ready to accept SIS commands.
• If the switcher is password-protected, a Password
prompt appears.
2. If necessary, enter the appropriate password.
If the password is accepted, the switcher responds with Login
User or Login Administrator.
If the password is not accepted, the Password prompt reappears.
AUDIO AUDIO
The Audio LED blinks.
Release the
button.
Hold
2 seconds
MPX 866 A • Remote Control 1312 MPX 866 A • Front Panel Operations