


9
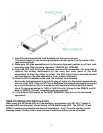
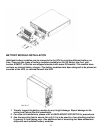
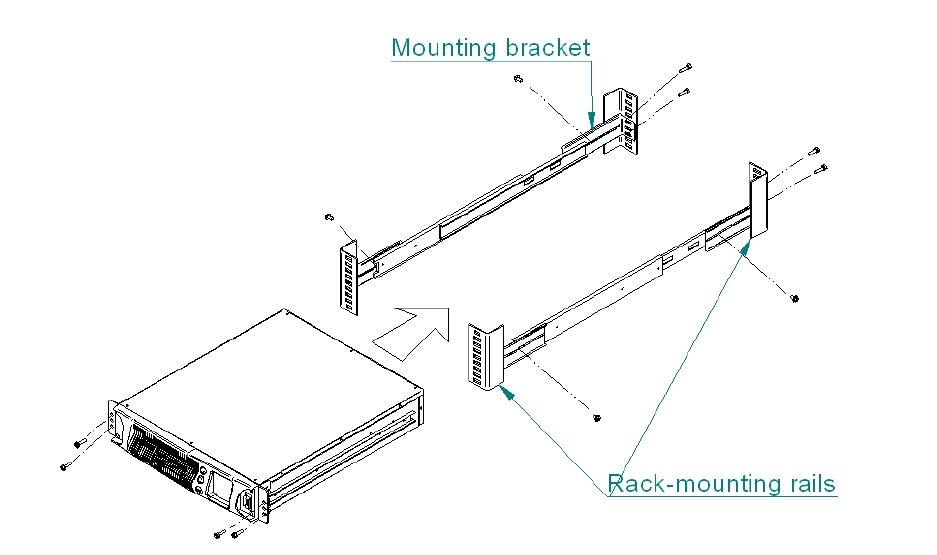
7. Install the slide assemblies, with brackets into the rack enclosure.
The return flanges on the mounting brackets and outer parts fit to the inside of the
rack-mounting rails.
8. Make sure the slide assemblies are in the same alignment position on all four rack-
mounting rails. After checking alignment, TIGHTEN ALL SCREWS.
9. Insert the UPS, with inner parts attached, into the slide assemblies. You may need to
depress the locking mechanisms on the inner and outer parts of the slide
assemblies to allow the slides to retract. The UPS should move smoothly forward
and backward on the slide assemblies. If not, recheck alignment.
10. Once the UPS is installed in the rack, the load may be connected.
Ensure the load equipment is turned off; plug all loads into the output receptacles on
the rear of the UPS. Plug the UPS into a dedicated wall receptacle properly protected
by a circuit breaker or fuse in accordance with national and local electrical codes.
Use a 15 amp rated device for 1000, or 1500 VA units, 20 amp for the 2200VA, and 30
amp for 3000VA. The wall receptacle must be grounded.
11. To turn on the UPS switch on the INPUT BREAKER; then turn on the connected
equipment.
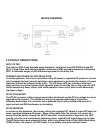
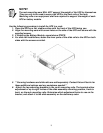
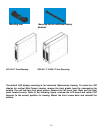
FREE-STANDING UPS INSTALLATION
When using the XG Series UPS in a free-standing configuration, the XG1.5K-1T model is
provided with mounting feet (shown below, left) to stabilize the UPS. The XG2.2K-1T and
XG3K-1T models are provided with keyhole hardware to “lock” the units together in free
standing mode. This key lock is also required if additional battery packs are added.