4-8
4.3 Replacing the Pad ASSY
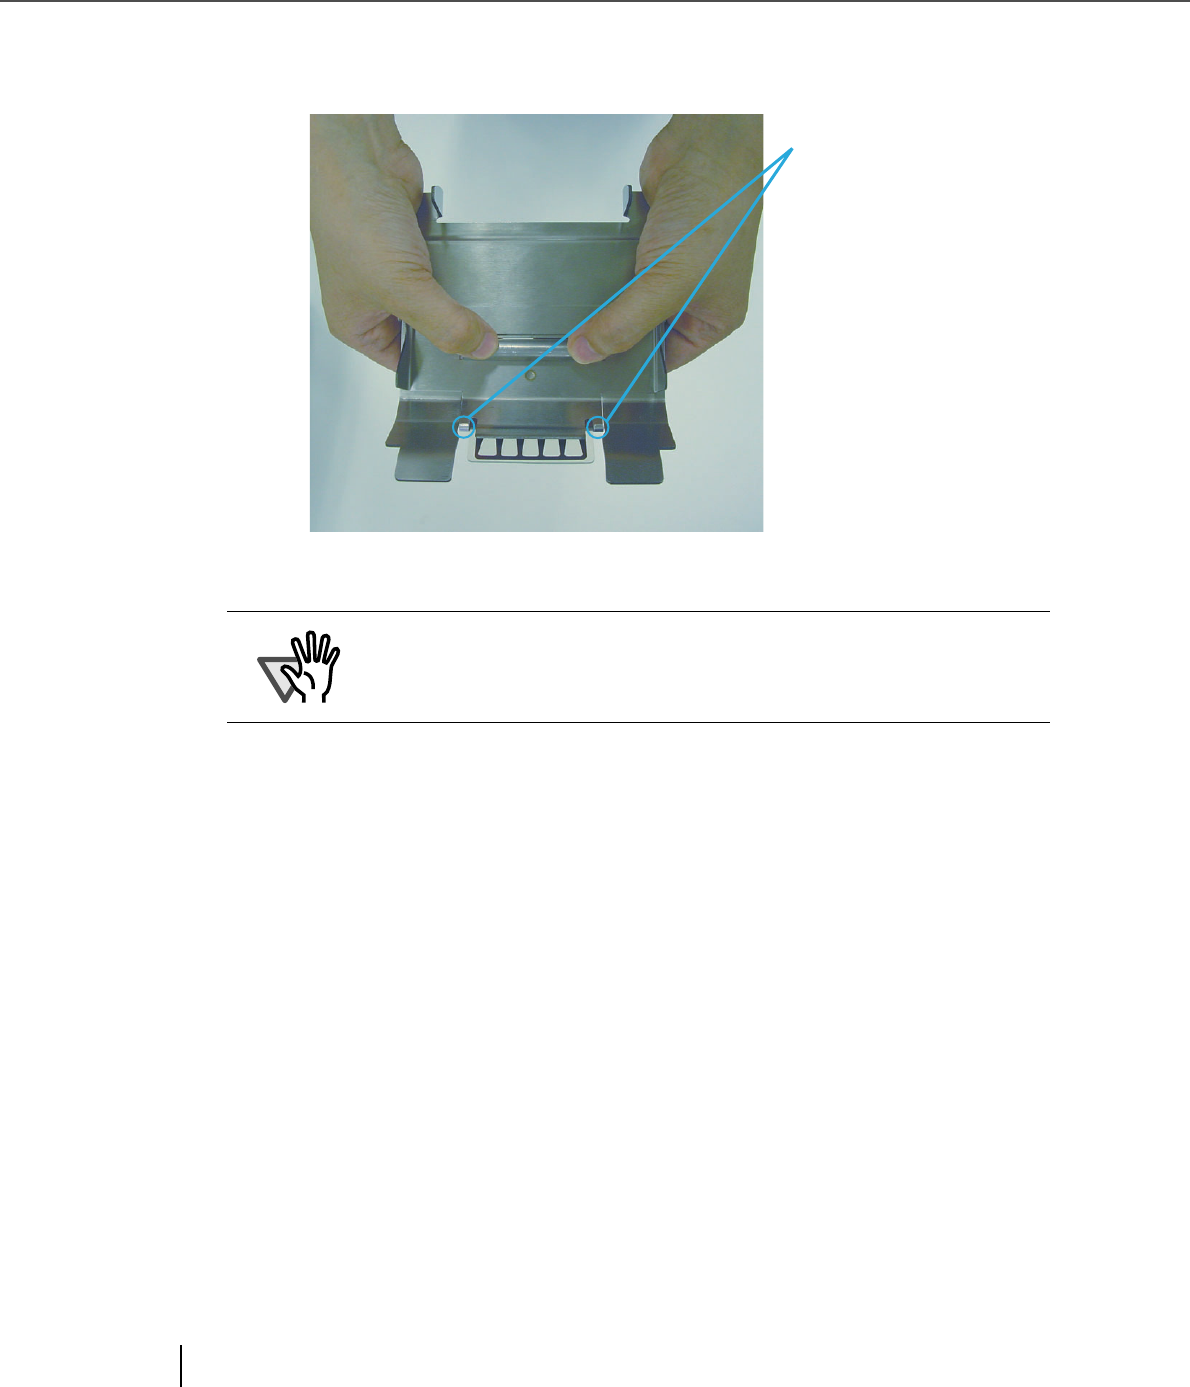
5. Attach a new Pad ASSY by engaging the hooks then pressing scroll into
the slot of the Guide plate.
6. Install the Guide plate in the reverse order of the removal. By pressing the
Guide plate down and pushing the Guide plate back then you can install it
smoothly.
7. Lower the ADF upper sheet guide gently.
8. Lift the Upper transport unit to release the safety lock, then lower the unit
carefully and push the unit to close it completely.
9. Clear the Pad counter.
Please refer to the section “7.3 Setup Mode Details”, “ 9. Abrasion counter
(Abrasion CNT) reset” on page 7-34.
ATTENTION
Confirm that the pad is firmly attached to the guide. Make sure that the two
tabs are engaged with the Guide plate.
If not attached firmly, paper feed errors such as document jams may occur.
Hooks


