4.2 Replacing the Pad ASSY
fi-5530C Image Scanner Operator’s Guide 67
REPLACING CONSUMABLES
4
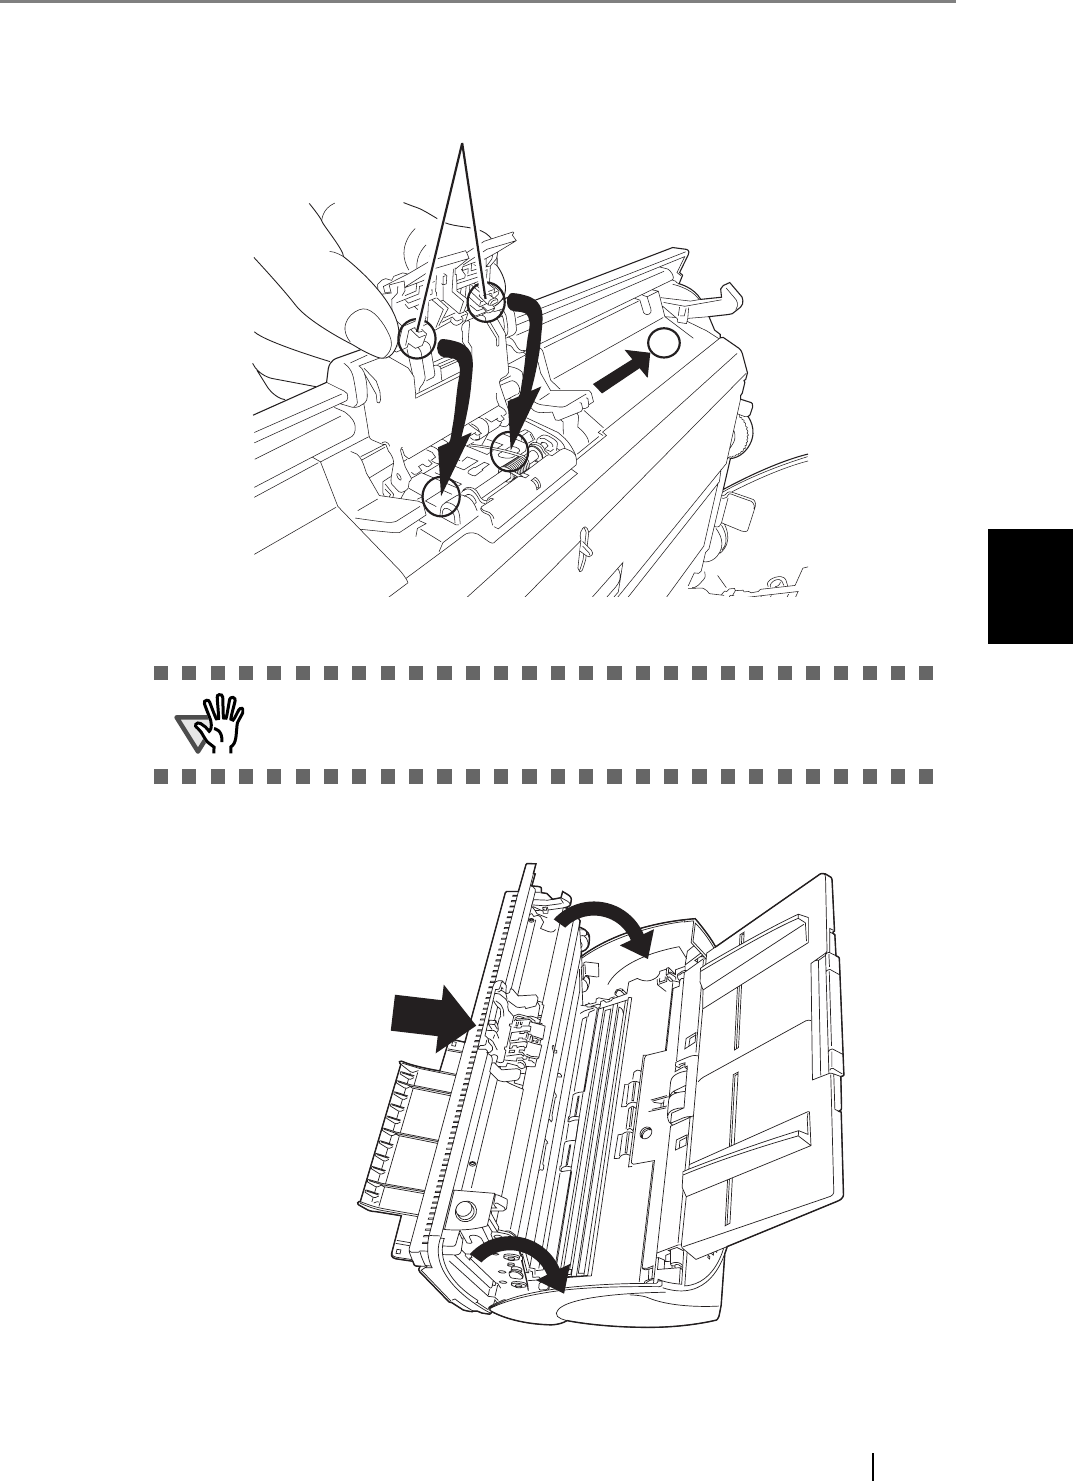
4. Attach new Pad ASSY.
Insert the claws of the Pad ASSY into the holes on the ADF.
Pressing down the Pad ASSY and slide it to direction "A" as shown in the illustration above.
5. Push in the center of the ADF to close it until the ADF button is locked.
ATTENTION
Make sure that the Pad ASSY is firmly attached. When the Pad ASSY is
not correctly attached, document jams or other feeding errors may occur.
Claws
A
Press the center of the ADF


