


1. OVERVIEW, SETUP
1-3
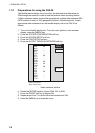
1.1.3 Accessing the FAX mode
1. Turn on the FAX-30 at the ship’s mains switchboard. The FAX-30 proceeds in
the following sequence:
a) The FAX-30 starts initial set up, which takes about 15 seconds.
b) The FAX-30 transfers (loads) data from the ROM to the RAM. At this time the
LED flashes every 0.4 seconds.
c) After all data has been loaded, which takes about two minutes, the LED
flashes every two seconds, indicating the FAX-30 is ready for operation.
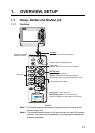
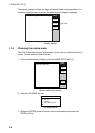
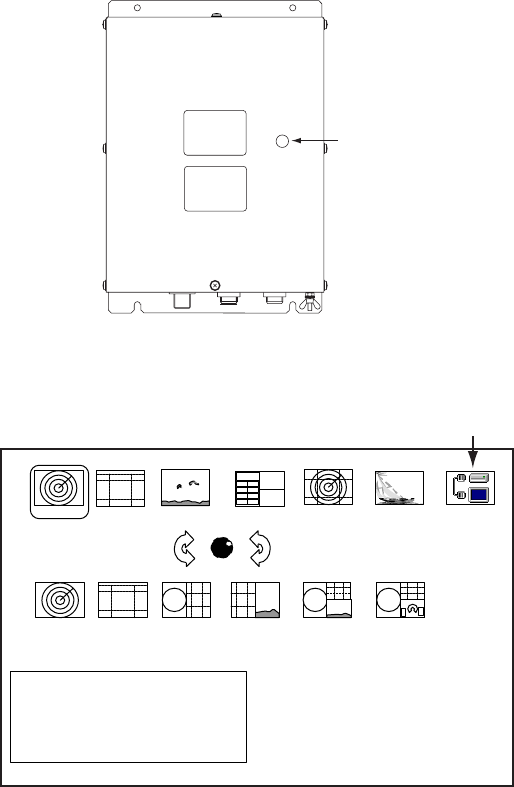
LED
(green)
FAX-30, top view
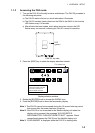
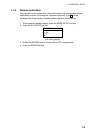
2. Press the [DISP] key to show the display selection window.
· TURN KNOB TO SELECT MODE
AND PUSH KNOB TO ENTER.
· PUSH ANY SOFTKEY TO
SELECT IMAGE SOURCE.
Fax mode icon
RADAR
PLOTTER
SOUNDER
NAV DATA
OVERLAY
EXT VIDEO
WXFAX
HOTPAGE 1 HOTPAGE 2
HOTPAGE 3
HOTPAGE 4
HOTPAGE 5
HOTPAGE 6
Display selection window
3. Rotate the [ENTER] knob to choose the WXFAX icon.
4. Push the [ENTER] knob to show the fax standby display.
Note 1: The FAX-30 cannot be accessed during the 15-second start up period
that occurs after the power has been turned on.
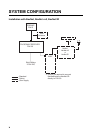
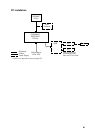
Note 2: If the FAX-30 is not connected to the NavNet display unit when the
display unit is powered, the message “AUX SOURCE IS
DISCONNECTED. PUSH ENT KNOB TO EXIT.” appears. Check
connections between the FAX-30 and the NavNet display unit.
Note 3: “LOAD IMAGES” is displayed while the FAX-30 is loading data.