


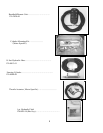

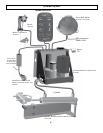

Mounting Hydraulic Unit
10
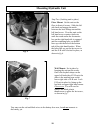
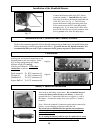
Step Two (Locking unit in place)
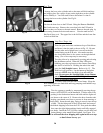
Floor Mount: Set the unit on the
floor in front of screws. Slide the left
side back and engage the notch
between the hose fittings around the
left hand screw. Pivot the unit on the
left hand screw counter clockwise
until the notch under the electronics
box on the right hand side is engaged
and the remaining hole you drilled
lines up with the hole in the bottom
tab of the right hand bracket. When
the holes line up, put the last screw in
and the E-H unit is locked in place, as
shown in fig.6.
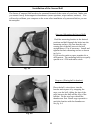
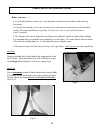
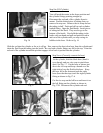
Wall Mount: Set in place by
hanging the unit on the screws.
One is the keyhole shape on the
upper left backside of E-H unit; the
other is the notched area on the
lower right side of E-H unit. Lock
E-H unit in place by lining up the
last hole on upper right hand corner.
Please note
: You will need to
remove the black plastic
thumbscrew to place the last screw,
as shown in fig.7
You may run the red and black wires to the battery box now, but do not connect to
the battery yet.
Fig. 6
Fig. 7
10