


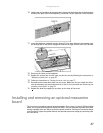

CHAPTER 4: Installing Components
46
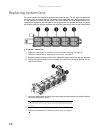
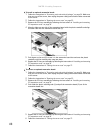
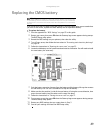
Replacing the hot-swap backplane
To replace the hot-swap backplane:
1 Follow the instructions in “Preventing static electricity discharge” on page 24. Make sure
that you turn off the server, then unplug the power cord(s) and all other cables connected
to the server.
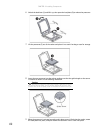
2 Unlock the bezel (if necessary) and remove it by pulling it straight off the front of the server.
3 Follow the instructions in “Opening the server case” on page 25.
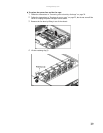
4 Remove all of the hot-swap drive carriers from the server and make note of which bay
you remove each drive from. For instructions, see “Removing and installing a hard drive”
on page 29.
5 Remove the fan duce, and the system fans and fan cage following the instructions in
“Replacing system fans” on page 38.
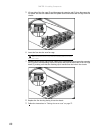
6 Disconnect all cables from the backplane.
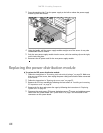
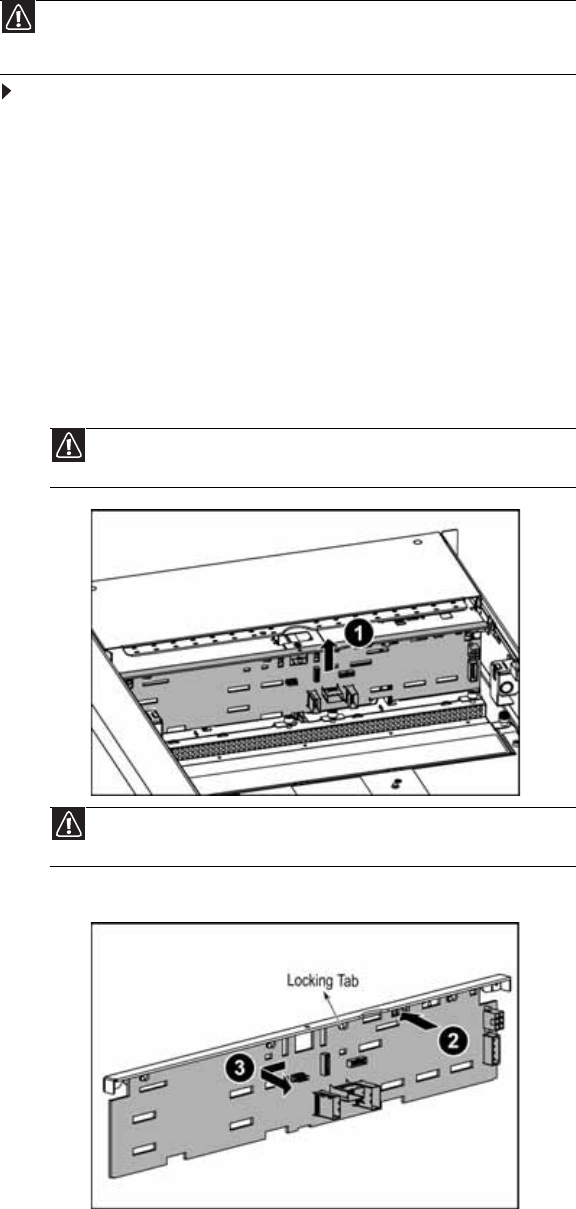
7 Pull the backplane bracket and backplane (1) out of the chassis.
8 Press the release tab (2) on the backplane bracket and push the backplane to the left (3).
9 Pull the backplane from the backplane bracket.
Caution
The hot-swap backplane is not hot-swappable. Before removing or replacing the
backplane, you must first turn off the server and all peripheral devices attached to the
server, and remove the AC power cord(s) from the power supply or wall outlet.
Caution
Pressing or pulling on any components on the backplane could result in
damage to the backplane.
Caution
Make sure you do not pinch, bind, or damage any cables as you install the
backplane.