


Chapter 5 Configuring Storage Systems and Logical Paths 5-15
Hitachi Universal Replicator for IBM /OS User’s Guide
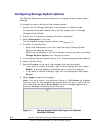
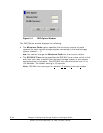
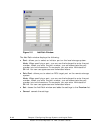
Adding Logical Paths
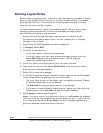
The Add Path window (see Figure 5-5) allows you to add one or more logical
paths between the local and remote storage systems.
One primary storage system can be associated with up to 64 secondary
storage systems. Up to eight logical paths can be configured between one
primary storage system and one secondary storage system. When you add a
logical path, URz will automatically start using the new logical path to perform
URz copy activities.
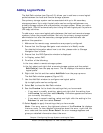
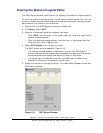
To add one or more new logical paths between the local and remote storage
systems, follow the procedure below. Not only the primary storage system
administrator but also the secondary storage system administrator can
perform this operation:
1. Make sure the remote copy connections are properly configured.
2. Ensure that the Storage Navigator main window is in Modify mode.
For detailed information about how to do this, please refer to Storage
Navigator User’s Guide.
3. Ensure that the DKC Operation window is displayed.
4. In Display, select DKC.
5. Do either of the following:
In the tree, select a remote storage system.
In the list, select and right-click a remote storage system and then select
Edit Path(s) from the pop-up menu. The list displays information about
logical paths.
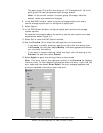
6. Right-click the list and then select Add Path from the pop-up menu.
The Add Path window appears (
Figure 5-5).
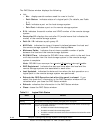
7. Use the Add Path window to configure new logical paths.
Up to eight paths can be configured.
8. Select Set to close the Add Path window.
9. See the Preview list to check the settings that you have made.
– If you want to modify a setting, select and right-click the setting from
the Preview list and then select Modify. A window appears and allows
you to modify the setting.
– If you want to cancel a setting, select and right-click the setting in the
Preview list and then select Cancel.
10. Select Apply to apply the settings that you have made.
Note: If an error occurs, the rightmost column of the Preview list displays
the error code. To view detailed information about the error, right-click the
error code and then select Error Detail. An error message appears and
gives you detailed information about the error.