


20
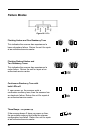
Secondary Scanner
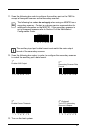
1. Turn off the host system.
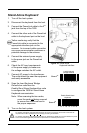
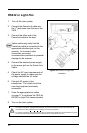
2. Connect the round end of the PowerLink RS232 AUX cable [PN 54-54667A] to
the RS232 jack of the secondary scanner (see Figure 23).
3. Connect the other end of the PowerLink RS232 AUX cable into the 3
rd
jack
down from the top of the 7600.
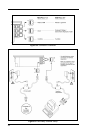
The following Honeywell scanners can be used in the “Aux” input of the
MS7600: the MS9520, MS9540, MS7220, MS7120, MS6720, MS6220,
MS6520, MS5145 or another 7600.
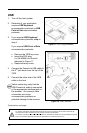
4. Connect the 7600/Host PowerLink* cable to the appropriate interface jack on
the back of the 7600.
5. Connect the other end of the 7600/Host PowerLink cable to the host.
6. Connect the external power supplies for the secondary scanner and the
7600 to the power jacks on the two PowerLink cables.
Before continuing verify that the PowerLink cables are connected to the
appropriate interface jacks on the scanner. An incorrect cable connection
can cause communication problems or potential damage to the scanner.
7. Insert the attached rubber plug into the remaining jack not being used on the
7600.
8. Check the AC input requirements of both power supplies to make sure the
voltage matches the AC outlets.
9. Connect AC power to the transformers. The outlets should be near the
equipment and easily accessible.
10. Configure the 7600 for the appropriate interface configuration settings*.
Continued on the next page.
* The 7600/host cable connection is interface dependent. Refer to the
installation steps provided for the type of interface (RS232, RS485, etc.)
required for your application.
Caution:
To maintain compliance with applicable standards, all circuits connected to the scanner must meet the
requirements for SELV (Safety Extra Low Voltage) according to EN 60950.
To maintain compliance with standard CSA C22.2 No. 60950-00/UL 60950 and norm EN 60950, the power
source should meet applicable performance requirements for a limited power source.